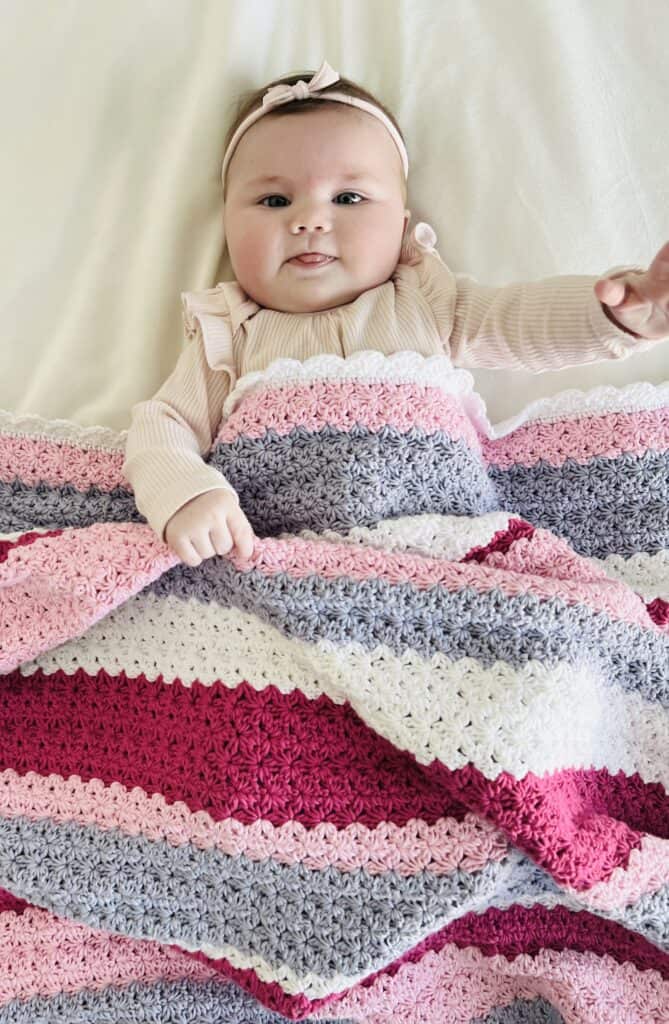
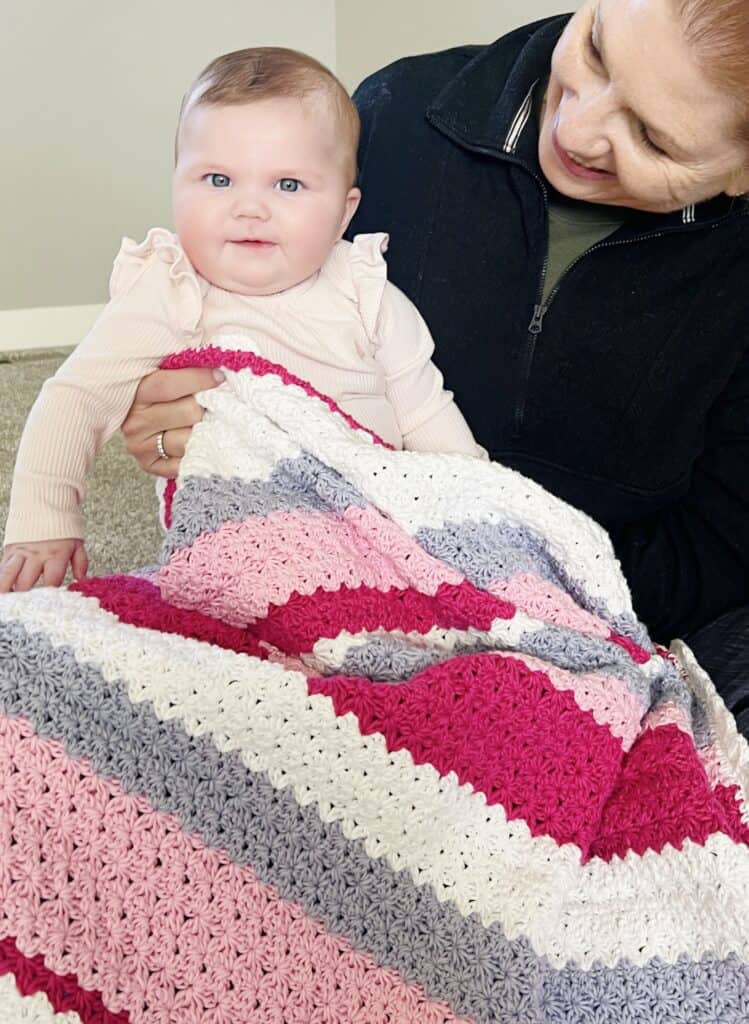
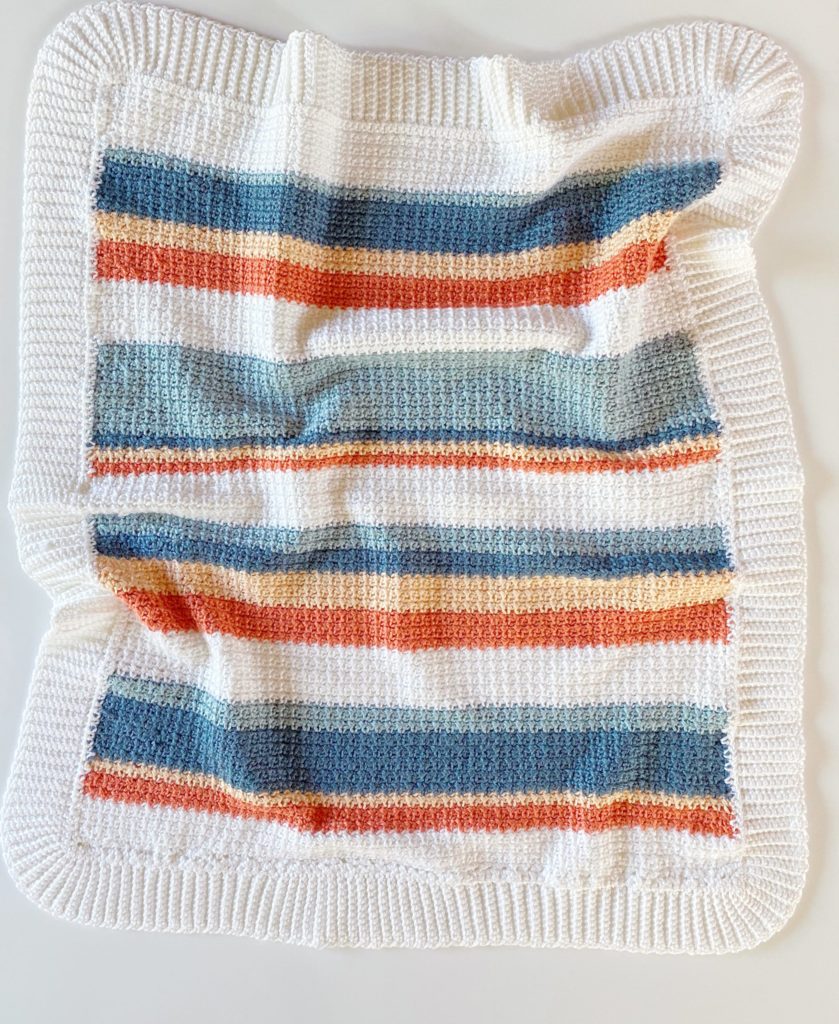
I quickly made Nora a Mixed Stripe Flower Blanket last week so I could cuddle and snuggle her when I saw her! She did not disappoint with her sweet little face. I was so happy to be able to see her over the Memorial Day weekend. (And so fun to see James too, although he is almost two and nearly impossible to catch these days. My little crochet models have short careers!)
Let’s chat about this blanket and how rapidly it works up though. Once you get in the rhythm of the stitch, it just flows. This blanket pattern is not new on our site, this is the third time I have made it. The original pattern is from my dear friend’s mom and I recreated the blanket for her daughter. It is called the CJ’s Flower Stitch Blanket.
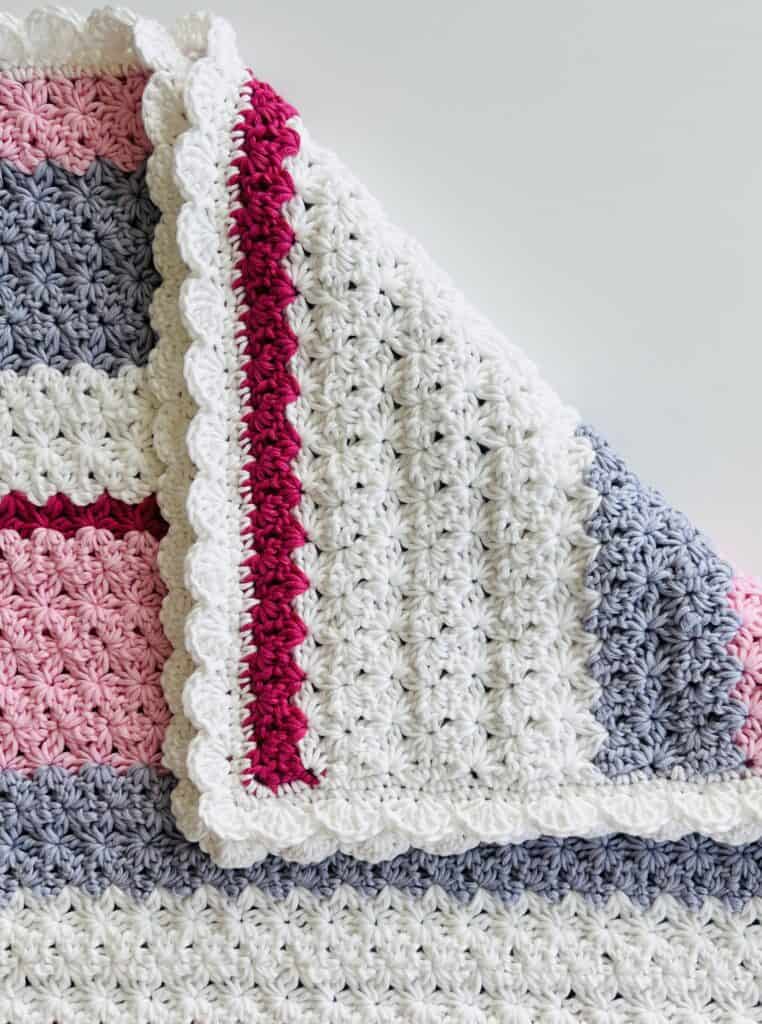
This stitch is best described as a double crochet version of a star stitch. It uses a similar idea but it’s just not quite the traditional star stitch.
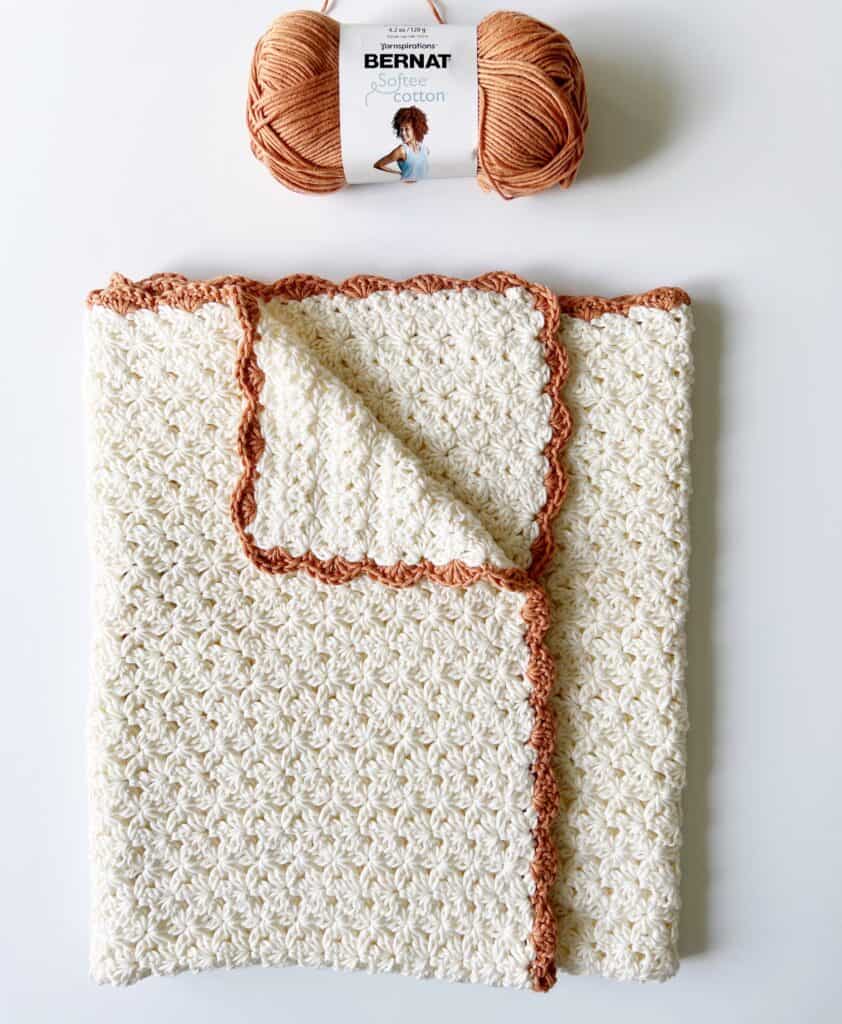
I then made it with Bernat Softee Cotton and loved this blanket pattern even more! I made it for a shower gift and it really was a stunning blanket. I think this might be the version many of you might have seen or made yourself.
Although I do love it in a solid color, mainly because I love seeing the texture of the stitch, I wanted to try working it in different colors and see the result. I also had multiple colors of Bernat Softee Cotton to use up, so this seemed like the perfect project to make.
The color I used reminds me of Valentine’s Day Sweethearts, so maybe Nora will use it well next year too! Overall, I’m just so glad to have made her a blanket, my hope is that she will love it and be able to cuddle with it when I’m not there to cuddle her in person. (It’s hard not to live close!)
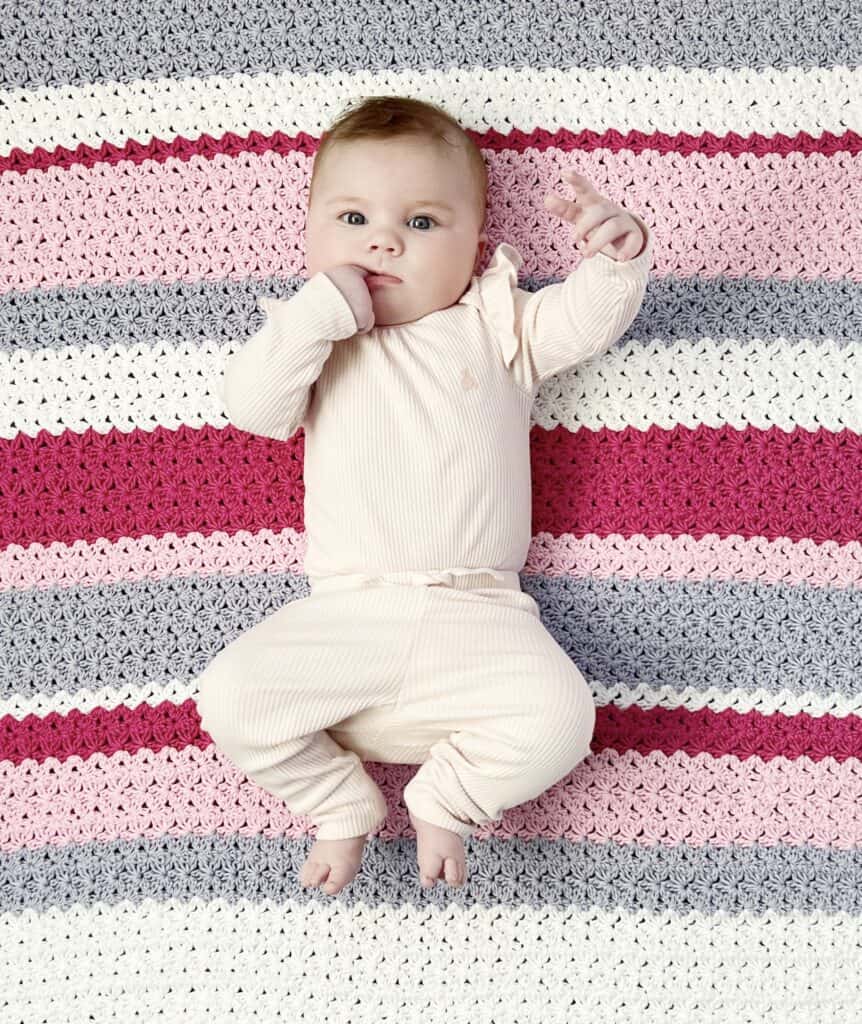
I also want to share a little tip about mixing stripe widths and encourage you to go on your own intuition as you work the rows. I think, and this is just my own opinion, but when I do mix up the width of the stripes, I like to keep the colors in the same order.
If you look closely, I’m keeping the order of the colors the same whether I’m using the color for 1 row or 10. The order of the colors is always the same. In this instance, I started with pink, then lavender, then white, then fucsia. I kept that order for the entire blanket but mixed up the width of the stripes.
We did this in another popular blanket pattern that we have on the site called the Baby T Blanket. Annie made this one using four colors and white and made sure the rows equaled the same number, but she did mix up the width of the rows while keeping the order of the colors the same.
It seems to keep the overall color balance of the blanket in sync while you are playing around with different widths. Anyway, it’s just something fun to try if you want to strike out on your own and do your own colors and stripe widths.
I did make another video tutorial for this flower blanket so I could show you how to change colors at the end of the rows. It will be linked at the end of the pattern. I did cut and weave in the ends, I did not carry yarn up the side of the blanket for this one.
The border is a simple two rounds of single crochet followed by a round of shell stitch that is a little more pronounced than the second flower blanket I made. I think it gave it just the right finish for Nora.
Materials
Bernat Softee Cotton, Bernat Softee Baby Cotton, (same yarn, just different colors under different labels tap name of yarn to shop Yarnspirations.com.) 60% Cotton, 40% Acrylic, (120g / 4.2 oz, 232 meters / 254 yards)
1 to 2 skeins of Pale Periwinkle, Petal and Fuschia, 2 to 3 skeins Clear White
Size G, 4.00mm hook, tapestry needle, scissors
Size
approximately 36 x 39 inches
Pattern
CHAIN 156 or any multiple of 3 to approximately 35 inches with Petal.
ROW 1: Work 1 DC into the 3rd chain from the hook. Chain 3. Work the first leg of the DC5TOG into the first chain of chain 3, (yarn over, insert your hook, yarn over and pull a loop back through, yarn over and pull through 2 loops.)
Yarn over and insert your hook into the base of the DC to work the 2nd and 3rd legs of the DC5TOG, (*yarn over, insert your hook into the base of the DC, yarn over and pull a loop back through, yarn over and pull through two loops, repeat from *.)
Skip 2 chains, yarn over and insert your hook into the next chain to work the 4th and 5th legs of the DC5tog, (work legs as explained for 3rd and 4th.) After making the fifth leg, there should be 6 loops on your hook, yarn over and pull through all 6 loops.
*Chain 3. (The first chain is considered the eye of the flower or center.) Work the first leg of the DC5TOG in the eye, or first chain, work the 2nd and 3rd legs of the DC5TOG in the chain stitch where the last stitch was worked, skip 2 chains, work the 4th and 5th legs into the next chain. Repeat from * across the row.
After pulling through all 6 loops at the end of the row, chain 3, work 1 DC into the eye, chain 3, and turn.
ROW 2: Yarn over and insert your hook into the first chain, yarn over and pull through 2 loops, yarn over and insert your hook into the eye that is directly below the DC and Ch 3, work 2nd and 3rd legs, yarn over and insert your hook into the next eye, work 4th and 5th legs, yarn over and pull through all 6 loops.
*Chain 3, yarn over and work 1st leg in first chain or eye, work 2nd and 3rd leg into next eye, work 4th and 5th into next eye, yarn over and pull through all 6 loops. Repeat from * across the row. Turn as instructed in row 1. (chain 3, DC, chain 3)
REPEAT ROW 2 instructions until blanket is 35 inches high or height desired. To change colors, pull through with new color on the last stitch of the row.
Work the color changes in this order: Petal, Fucshia, Clear White, Pale Periwinkle. Make the width of each color as many rows as you’d like. Keep the order of the colors the same, vary the width of each stripe.
Border
Round 1: Begin border by chaining 1 and turning. Work SC as evenly as possible across the top and sides of blanket, work 3 SC into each corner.
Round 2: Continuing in the same direction, work one more round of SC into each SC and 3 SC into the center SC of each corner.
Round 3: Continuing in the same direction, SL ST to the first SC of the round, *skip one SC, 5 DC into the next st. Skip one SC, SL ST into the next st. Repeat from * around the entire edge. Join with a SL ST to the first st of the round and tie off.
Please see the video tutorial for more information and help:
Thank you so much for stopping by!
XO, Tiffany
Click here or image below for free printable pdf.
![]()