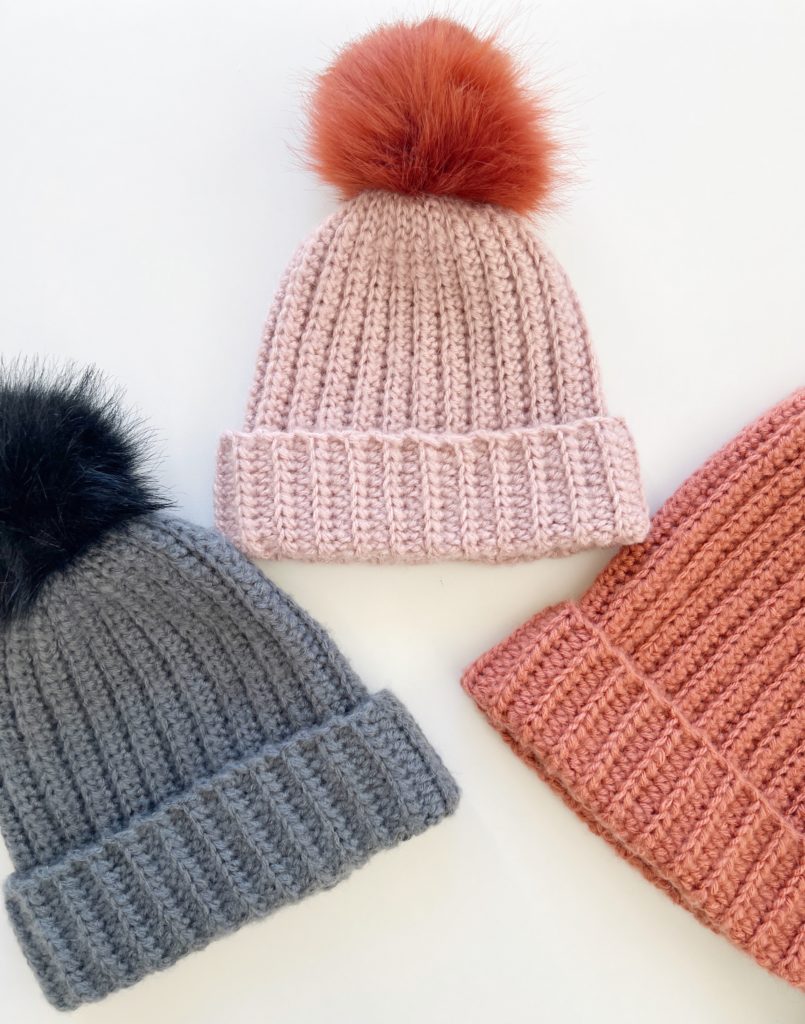
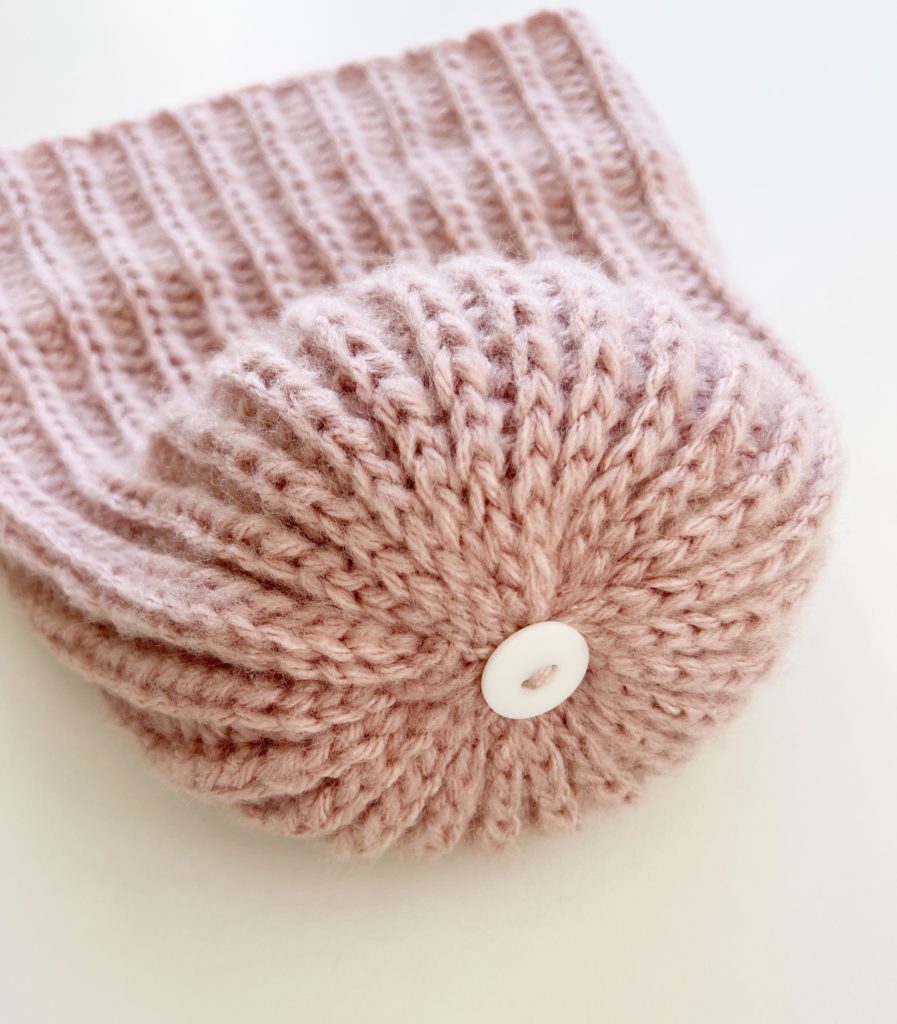
We are re-sharing the Crochet Easy Ribbed Red Heart Brushed Hat from our archives today. We love a simple classic hat that you can make in a day or two. I made several last year and in this post, I walk you through how to sew a button onto the underside of the hat, so you can easily attach the fur pom pom that come with an elastic.
Thanks as always for stopping by! We love sharing what we are crocheting for our friends and family.

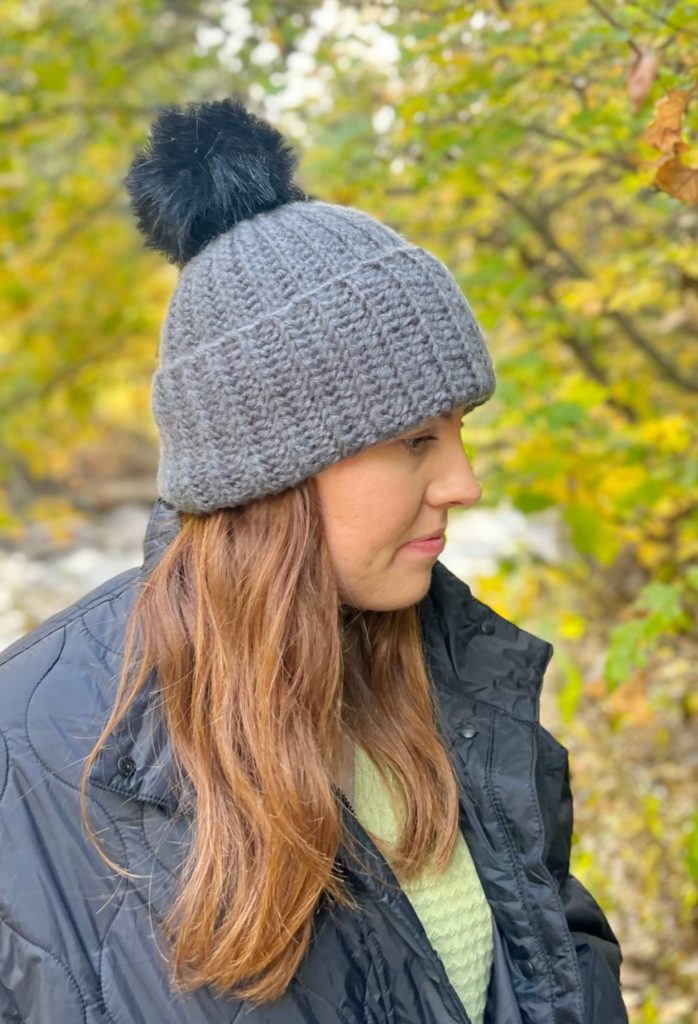
Annie went on a golf trip to Utah to visit Nicolina. She was also able to head up into the mountains to see the changing fall leaves.
(In Arizona, the leaves don’t change until November, so it’s fun to see them a little early.)
I quickly made her a few hats to take just in case the temps dropped, and also, for a beautiful photo shoot.

I had Red Heart Super Saver Brushed on hand and loved how they turned out.
I’m alternating a row of back loop half double crochet, with a row of half double slip stitch all worked into the back loop to get this ribbed look.
And, my favorite way so far, to attach pom poms that come with an elastic, is to sew a button on the inside of the hat.
I pick up these furry pom poms whenever I see them on sale at Michaels or Joanns, but I do know there are Etsy shops that sell them too.
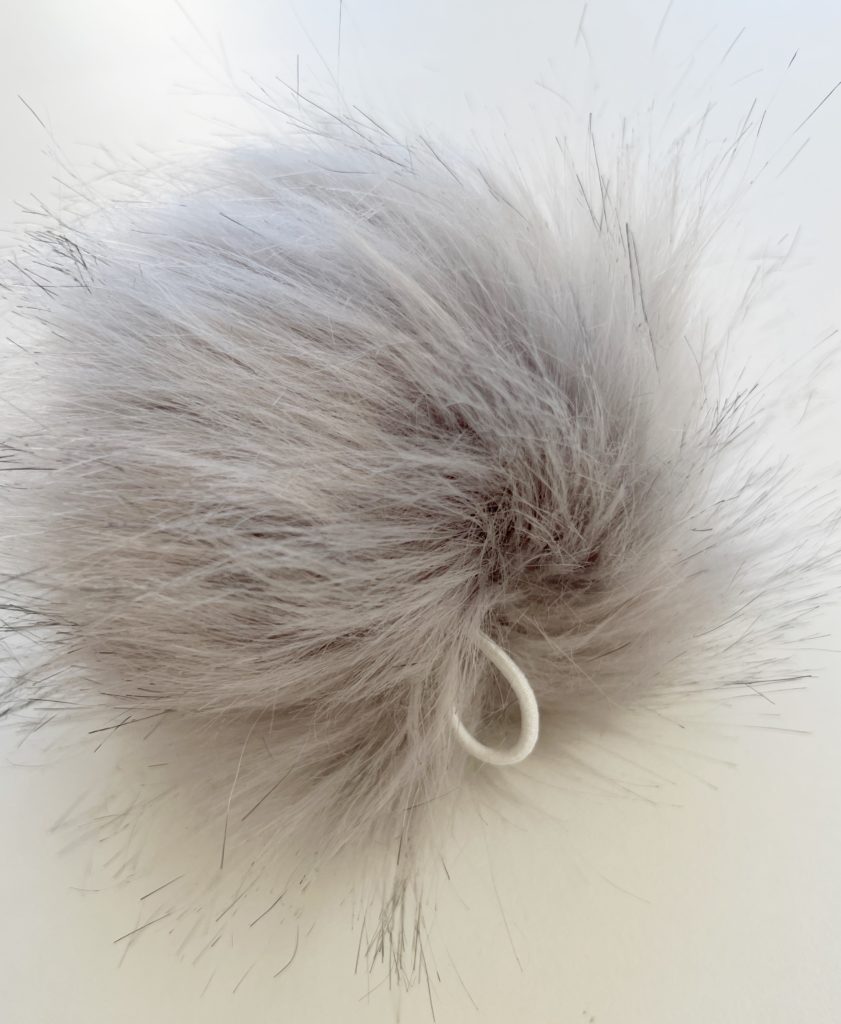
They are easy to remove if you want to wash the hat. Also, so much quicker for me to add a fur pom, than make pom poms.
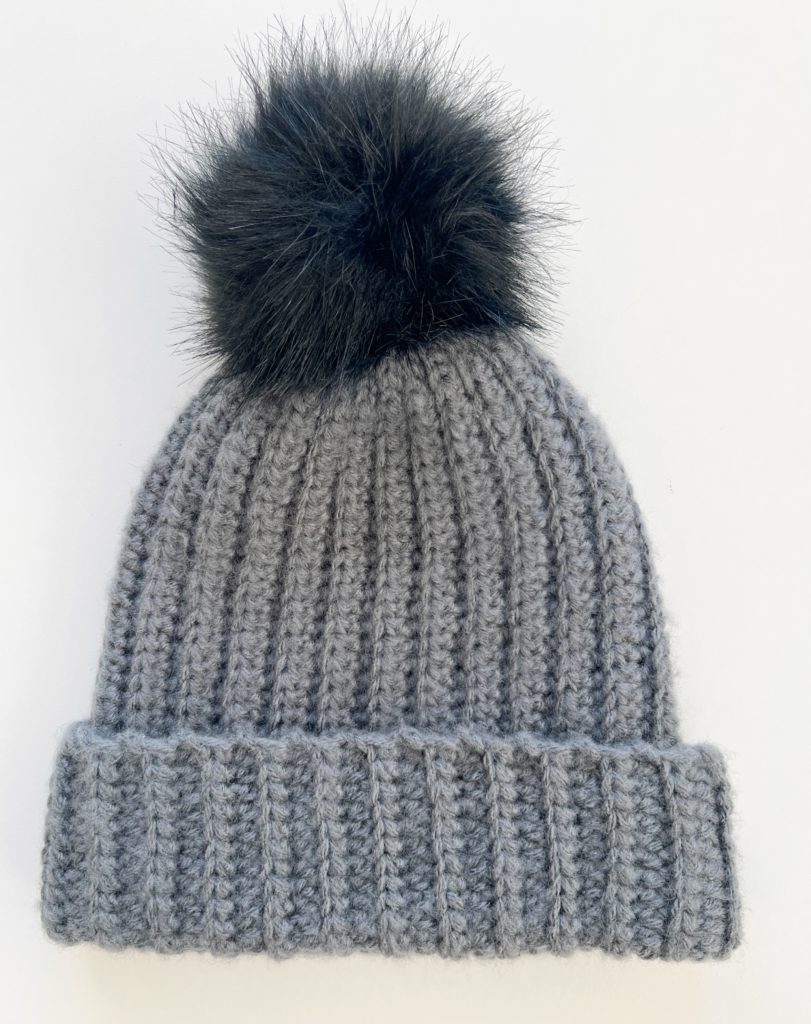
I’m happy to share this quick and easy hat pattern and also recommend Red Heart Super Saver Brushed. I was very pleased with the results and so was Annie!
Materials
Red Heart Super Saver Brushed (100% Acrylic,142 g/5 oz, 233 meters/255 yards, 4 weight)
1 skein any color (Annie is wearing dusty pink and shale, third hat in cover photo, clay).
Size I, 5.5mm crochet hook, tapestry needle, button, fur pom pom with elastic
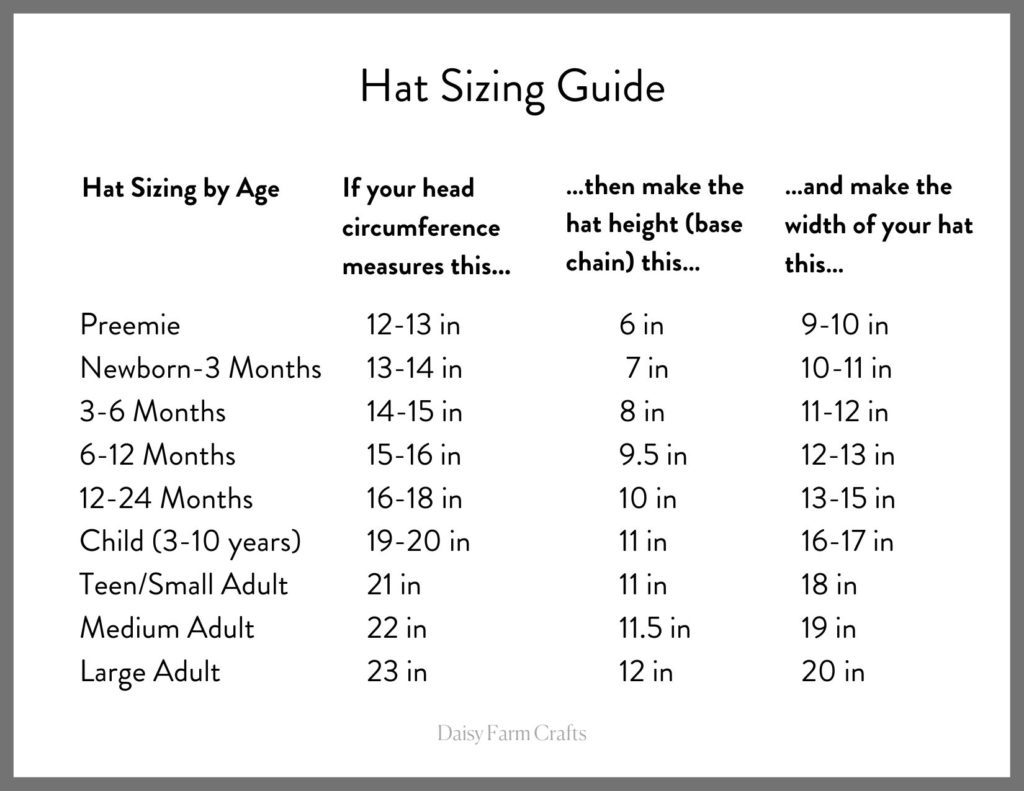
Size: Can be made any size according to the size chart below and starting chain the measurement of just below the nose to the crown of the head. (approximately 11.5 inches starting chain for Adult Medium) Work the width 3 inches less than head circumference measurement.
For a slouchier hat, make your starting chain from your chin to the crown of your head.
Stitches
Half Double Crochet (HDC): YO, insert your hook, YO and pull up a loop, YO and pull through all three loops on hook.
Half Double Slip Stich Back Loop Only (HDCSLST): YO, insert your hook into back loop, YO, pull up a loop and pull directly through two loops on hook.
(Click highlighted name of stitch if you need a video demonstration)
Pattern
Chain 45 (or amount needed for size)
ROW 1: Begin in the second chain from the hook with HDC. HDC into each of the next chains until 5 chains remain. SL ST into the remaining 5 chs. CH 1 and turn.
ROW 2: Work 1 SL ST into the back loop of each of the next 5 sts. HDCSLST into the back loop of each st to the end of the row. CH 1 and turn.
ROW 3: Work 1 HDC into the back loop of each st until 5 sts remain. SL ST into the back loop of the remaining 5 sts. CH 1 and turn.
Repeat ROW 2 and 3 until hat is the width needed.
End on a row 2 instructions so you are at the bottom of the hat (brim) before you begin to sew the hat together with SL ST.
Fold hat together matching the last row of stitches with the first row of chains. SL ST under both loops of the stitch and both loops of the bottom side of the starting chain. Continue toward the top of the hat to join the sides together.
Gather the top of the hat by working your tapestry needle in and out of each stitch across the top. Pull tightly to gather in, work tail around one more time and then weave in.
With starting tail, thread a button through and secure to the underside of the hat. Weave in tail, tie off.
Turn hat so the button is on the underside, use a crochet hook to reach up from the underside of the hat, attach the elastic to the crochet hook and pull through the hat, and twist the elastic several times around the button.
For more help, see the Video Tutorial below:
Click here or image below for free pdf of pattern.
![]()
Thank you so much for stopping by and good luck on your hat!
XO, Tiffany