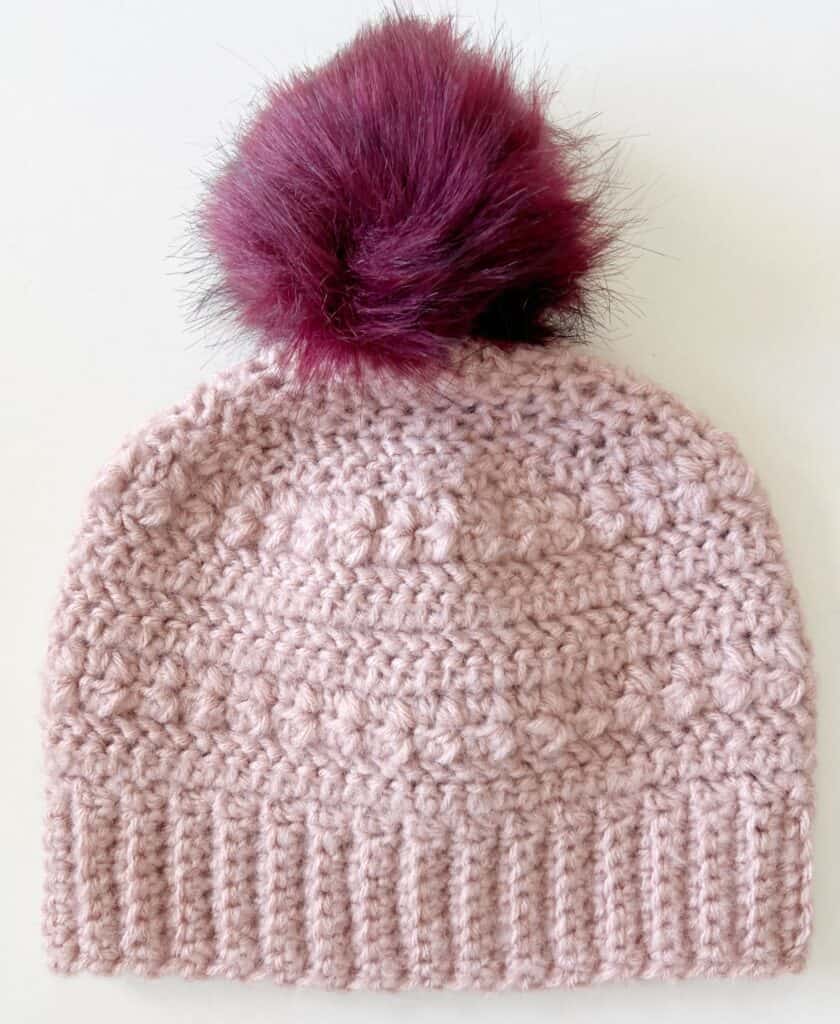
Hello there! Thank you so much for stopping by for the pattern for the Crochet Dreamy Hat and Bun Beanie. This is a hat that I’ve been wanting to make for a while, time has just gotten away from me. The Crochet Dreamy Scarf is a very popular scarf pattern we have on our site, and since I made it, I always wanted to make a companion hat.
Here is a photo of the Crochet Dreamy Scarf.
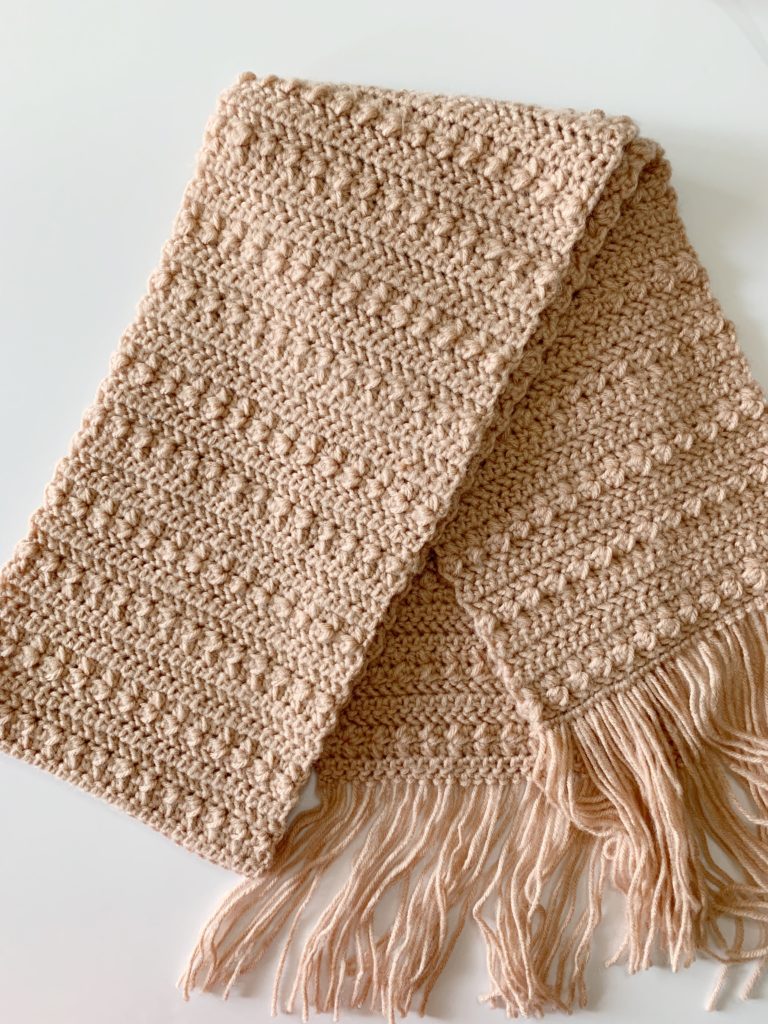
What has happened since I made that original scarf though, is that Red Heart Dreamy is out of production and discontinued. I have had to find a yarn that would make a fairly good substitution. Thankfully, Red Heart Brushed is a very close comparison to the Red Heart Dreamy.
Although they do not carry this beautiful buff color that the original Dreamy scarf was made in, they do have some very lovely shades. There are ten shades to choose from, from beautiful creams, to a few shades of red and shades of green.
The hat that Annie is wearing below is made with the color Clay, which is a very nice burnt amber color.
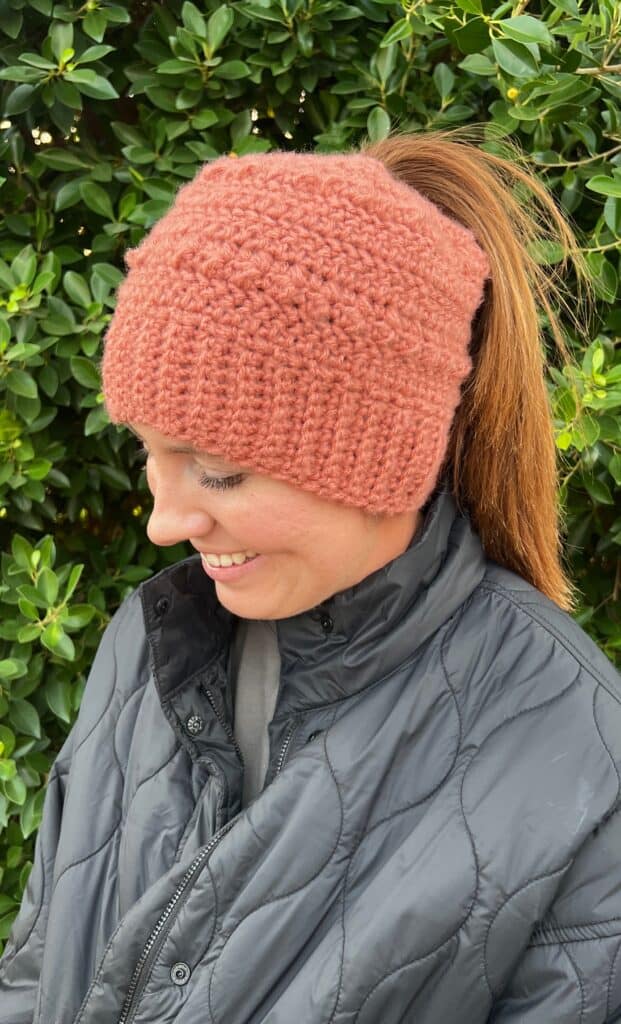
My girls love having the option of wearing a hat as a bun beanie as well as a regular hat. In the video tutorial that accompanies this pattern, I show you how to finish it off with a pom pom or an elastic to make it into a bun beanie.
Bun beanie means pulling a ponytail through the top of the hat. They love to have this type of hat for early morning runs.
The hat is made by working the band first. You’ll then sew it together to form a circle. Then you will work in rounds around one side of the band. Each round is joined with a slip stitch, chain one and turn. You will have several rows of decrease at the top of the hat and then you can choose to gather the top together, or work a round of single crochet around an elastic for the bun beanie version.
You also can sew a button on the underside of the hat and thread a pom pom that has an elastic through the top and twist around the button.
I also have been seeing pom poms that come with snaps. You’d sew a snap to the top outside of the hat and the pom pom would snap on and off.
Here are some I found on *Amazon that I’d like to try:
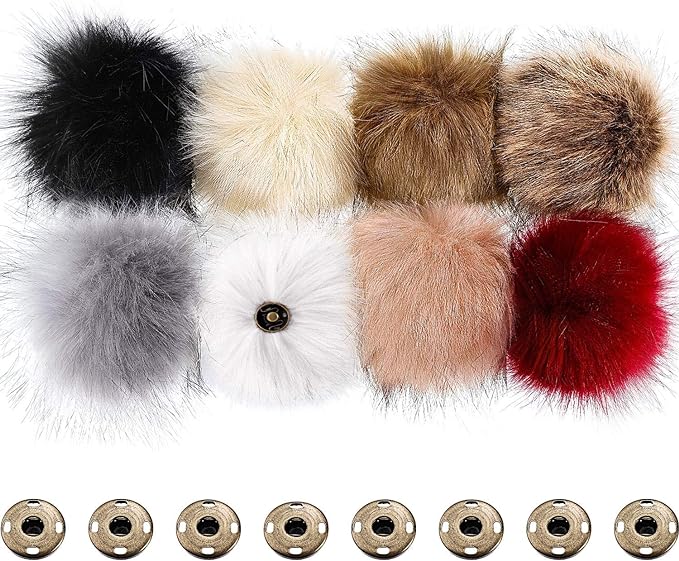
(They arrived and are great! Perfect size for children’s hats. If you need for adults, you might want the 6 inches in width size.)
Materials
Red Heart Super Saver Brushed (100% acrylic, 142 g/5 oz, 233 meters/255 yards, 4 weight worsted)
Tap name of yarn to see specs or buy on Yarnspirations.com
1 skein
Size I- 5.5mm hook, scissors, tapestry needle
pom pom with a snap or elastic, or elastic hair tie
button 1 inch or more
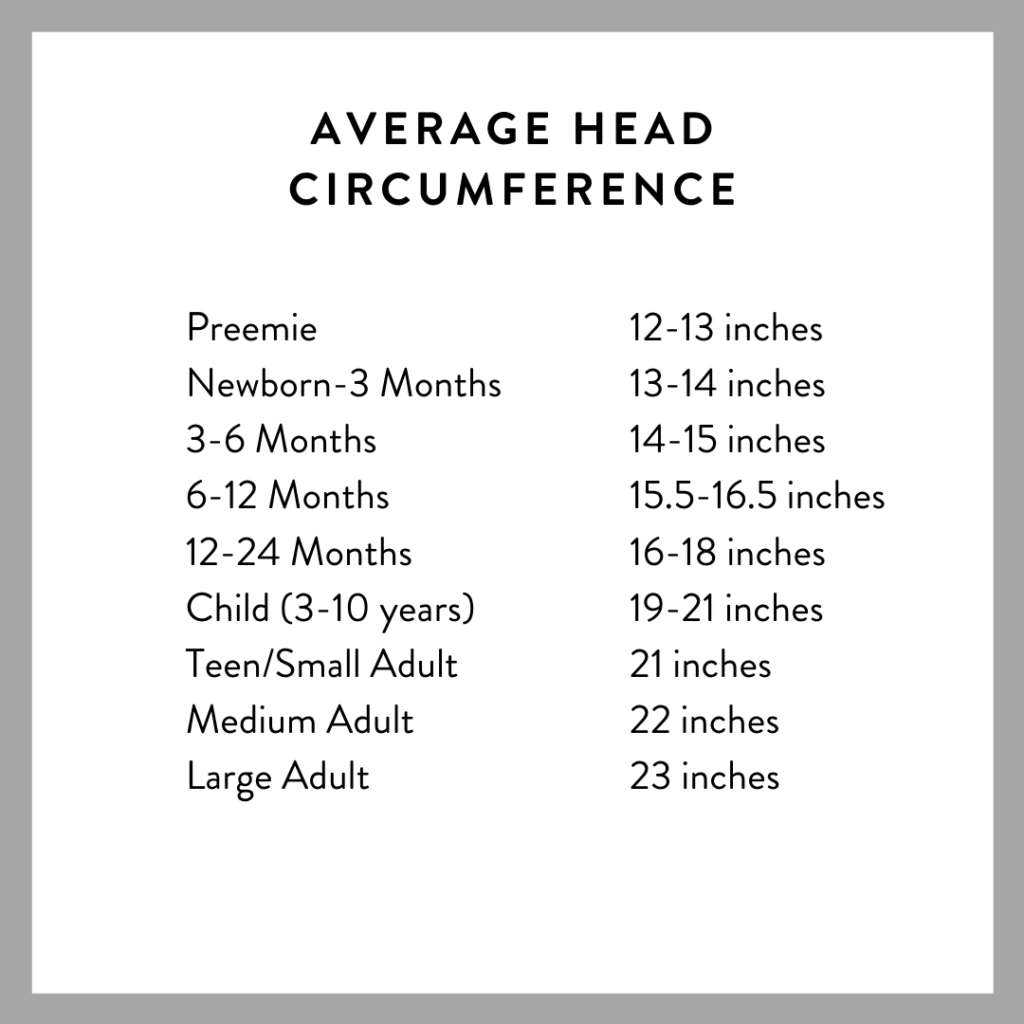
Size Chart:
Stitches
Single Crochet (SC): Insert your hook, YO and pull up a loop, YO and pull through two loops on hook
Herringbone Half Double Crochet (HHDC): Yarn over, insert hook into designated stitch. Yarn over pull back through and through the first loop on the hook. Yarn over and pull through the remaining 2 loops on the hook. Stitch complete.
HALF DOUBLE CROCHET CLUSTER (CL): Yarn over, insert hook into designated stitch, yarn over and pull a loop back through, yarn over, insert hook into the same stitch, yarn over and pull a loop back through. Yarn over and pull through all loops on the hook.
Pattern
Brim
Chain 10. (Leave a long tail for sewing when you make the starting slip knot)
ROW 1: Begin in the second chain from the hook with SC. SC into each chain across the row. CH 1 and turn. (9)
ROW 2: Work SC into first st of the row. Work back loop SC into each of the next 7 sts. SC into last st of the row. CH 1 and turn.
(Tip: the first st and last st of the band are worked under both loops (regular SC). The other SC are worked into the back loops.)
ROW 3: Repeat row 2 until 3 inches less than the head circumference needed. (See size chart above.) For an adult medium size hat chain until you have 19 inches. (or if you like a more snug fit, 4 inches less that head circumference)
Place a stitch marker into the last stitch to hold the st while you sew the band into a circle with the tapestry needle. Replace hook into the stitch and chain one.
Round 1: With the outside of the band facing you, work 2 SC into the end of a row, skip a row. Repeat from * around the entire band. Join with a slip st to the first SC. CH 1 and turn. You should have an even number of SC.
Round 2 and 3: Work 1 HHDC into each st around. Join with a SL ST to the first st of the round, CH 1 and turn.
Round 4 and 5: Work 1 CL into the first st of the round, SC into the next. Continue alternating CL and SC around. Join with a SL ST to the first CL of the round, CH 1 and turn.
Round 6, 7, 8 and 9: Work 1 HHDC into each st around. Join with SL ST to the first st of the round. CH 1 and turn.
Round 10 and 11: Repeat round 4 and 5.
Round 12: (Decrease) Work 1 HHDC into each of the first 2 sts, skip next st. *HHDC into each of the next 2 sts, skip next st. Repeat from * around. Join with a SL ST, CH 1 and turn.
Round 13: Work 1 HHDC into each st around. Join with SL ST, CH 1 and turn.
Round 14: (Decrease) Repeat round 12.
Round 15: Repeat Round 13.
To finish as a Bun Beanie:
Round 16: Place an elastic hair tie on the inside of the hat and work SC into each st catching the hair tie as you go. Tie off and weave in all ends.
To finish as a hat with a pom pom or plain, with tapestry needle, weave in and out of top stitches and gather in. Continue around to further gather in. Weave in end.
Sew a button on the underside of the hat if using a pom pom with an elastic.
Sew snaps to the top of the hat if using pom pom with snaps.
Please see the video below for further help:
Thank you so much for stopping by! I hope you have fun making the dreamy hat or bun beanie.
XO, Tiffany
Click here or image below for free printable pdf.
![]()