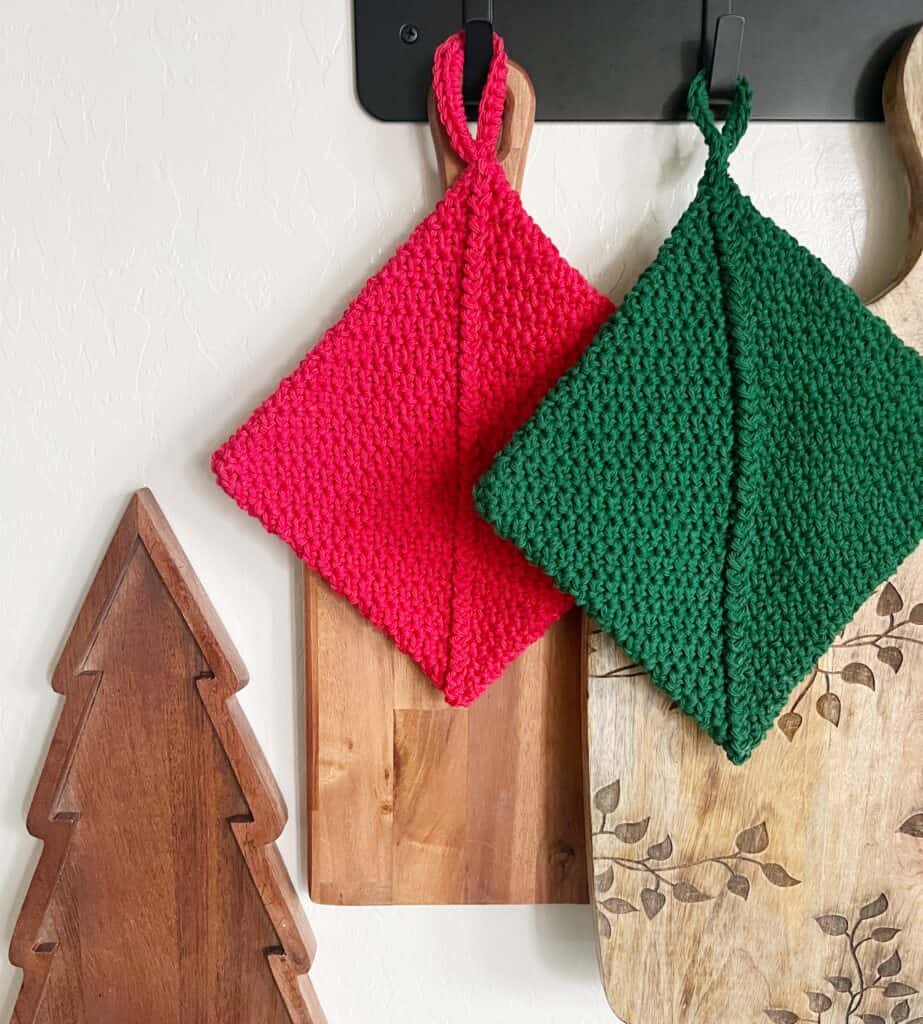
Hello and Happy Holidays! Every year I try and make a pot holder for my friends or neighbors and share the pattern with you.
My mom asked me for a few years to get what she calls a “Magic Hot Pad” pattern on my site. She remembers making these in the 70’s for her kitchen and gifts for friends. She taught me as a teenager and I remember making a few of these to help her around the holidays.
It’s a classic and easy pattern to make and my guess is there are a lot of variations in patterns for one and my mom couldn’t quite remember her pattern for it, but she gave me the gist of it.
I went ahead and did a small variation on the single crochet and alternated working in the front loop and then the back loop as I worked around the base chain.
It’s a simple pattern and great for beginners. There are no turns or joins and you only have the final end to weave in.
I used 100% cotton Lily Peaches’n Creme that I found at my local Walmart, but they also are available under a different name called Lily Sugar’n Creme that are available on Yarnspirations.com. I was able to make one hot pad with one ball of the Peaches’n Creme.
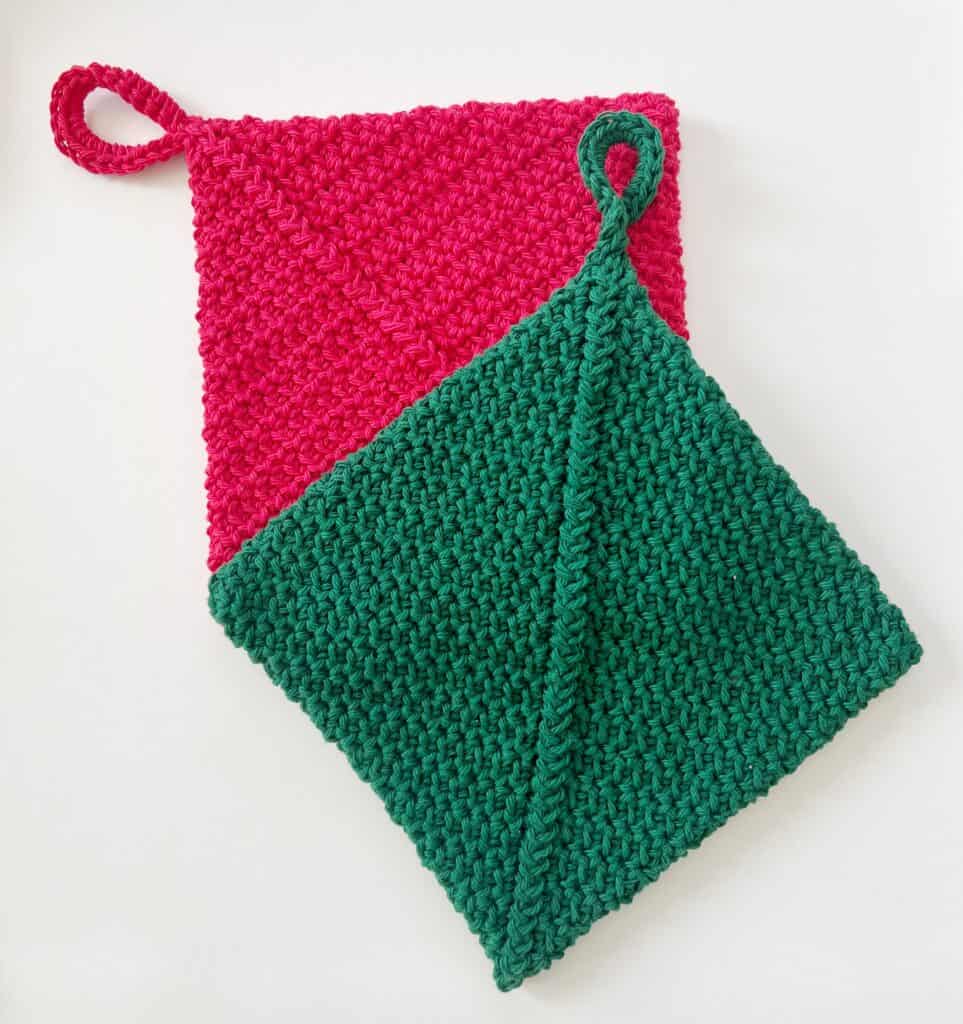
They are approximately 8 inches square.
Thank you so much for stopping by! If you’d like to see other Hot Pad patterns, be sure and check out our patterns under the menu heading “Hot Pads.”
Materials
1 ball of Lily Sugar’n Cream (100% cotton, 71g / 2.5 oz, 109 meters / 120 yards)
Size H, 5 mm hook, tapestry needle, tape measure
Gauge: 4 inches = 15 sc and 15 rows of pattern
Stitches
Single Crochet (SC): Insert your hook, YO pull loop back through, YO pull through both loops.
Pattern
Chain 43 (Or an odd number to 10 inches)
ROUND 1: Begin in the second chain from the hook with SC. SC into each chain to the last chain. In the last chain, work 3 SC. Rotate chain to begin working on the bottom of the chain. SC into each space, in the last space work 3 SC. Do not turn or join the round.
(TIP: take the time to make sure you have an even number of stitches if you like the texture that I achieved, an odd number will give a slightly different texture, which is fine too, but if you want the look I’m showing you need 84 or 86 sts.)
ROUND 2: Begin in the next SC by working *SC into the back loop. SC into the front loop of the next SC. Repeat from * around. Do not join the rounds or turn.
Remaining Rounds: Follow round 2 instructions until you have 5 inches in height. End your round at the halfway point.
Before joining, decide which side of texture you want to be on the outside of your hotpad.
To join: Shape the rectangle into a square with the side you want to be facing out, and with the last stitch you worked as one of the points. Slip stitch the two sides together by working one slip stitch underneath the back loop of one side, and then slip stitch underneath the back loop of the other side.
When you reach the other end, Chain 15. SL ST to the point of the hot pad to make a circle with the chains. Work 20 SC around the loop. SL ST again to the point of the hot pad and tie off.
Weave in your ends.
Please watch the video below if you need any help at all with the pattern.
My daughter Annie snapped a photo of me putting the hot pads to good use! I just might keep this set for me.
XO, Tiffany

Click here or image below for free printable pdf.
![]()