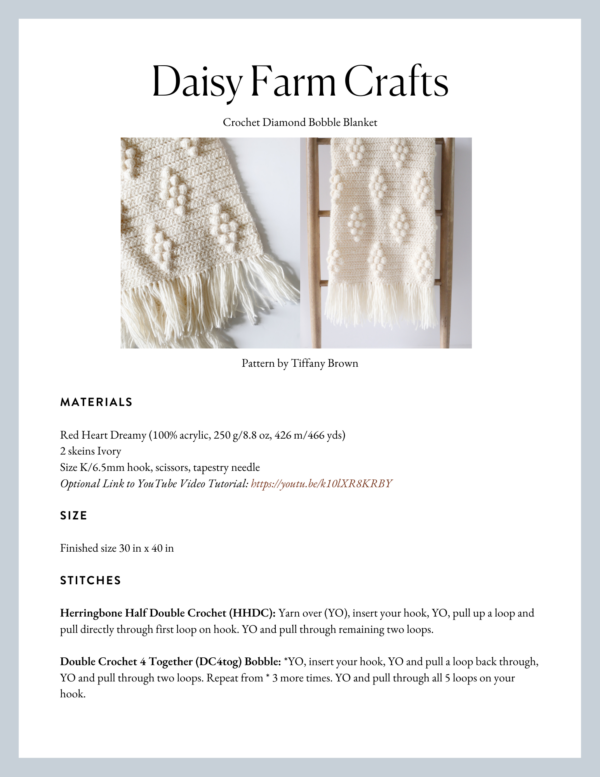
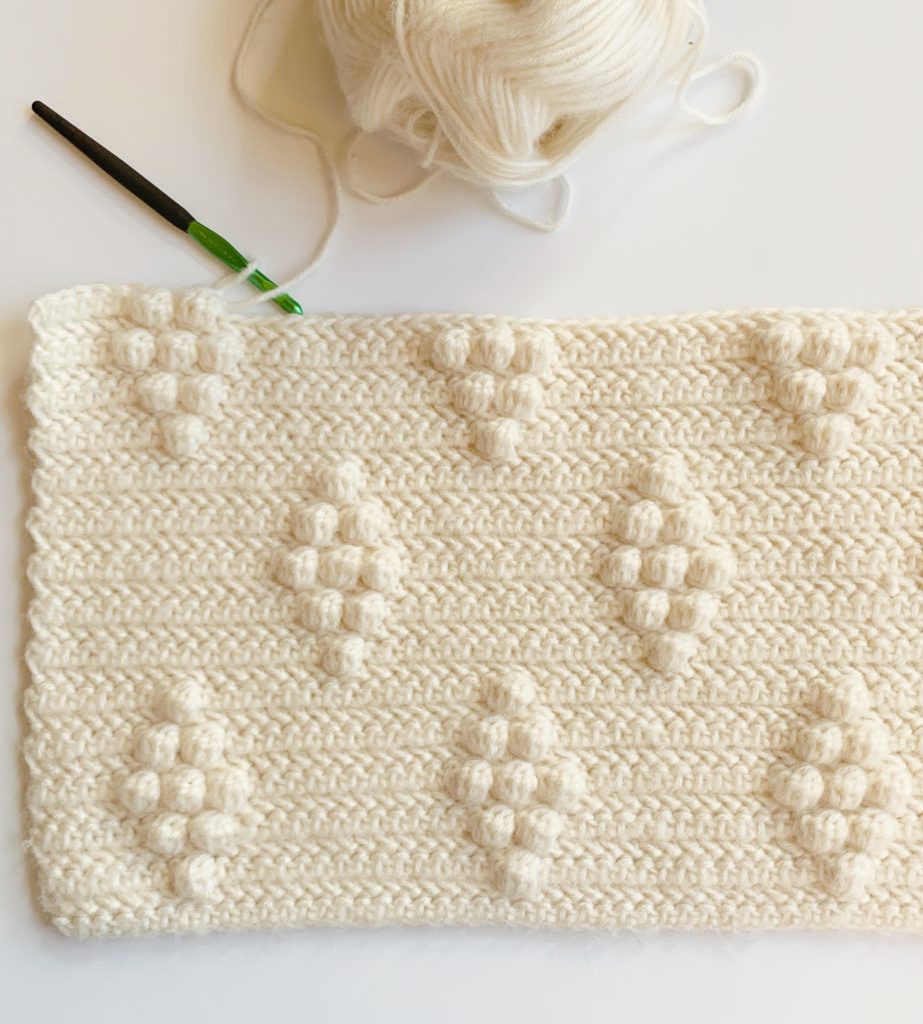
I tweaked Hannah’s Diamond Berry Blanket and turned it into this Diamond Bobble Blanket. Really the only difference is the stitches used. Where she used single crochet, I used herringbone half. Instead of using the berry stitch, I used dc4tog bobbles.
Here’s a picture of the original pattern:
If you’ve made this before, you’ll know that it’s much easier than it looks! The counting is a breeze once you get the first row established.
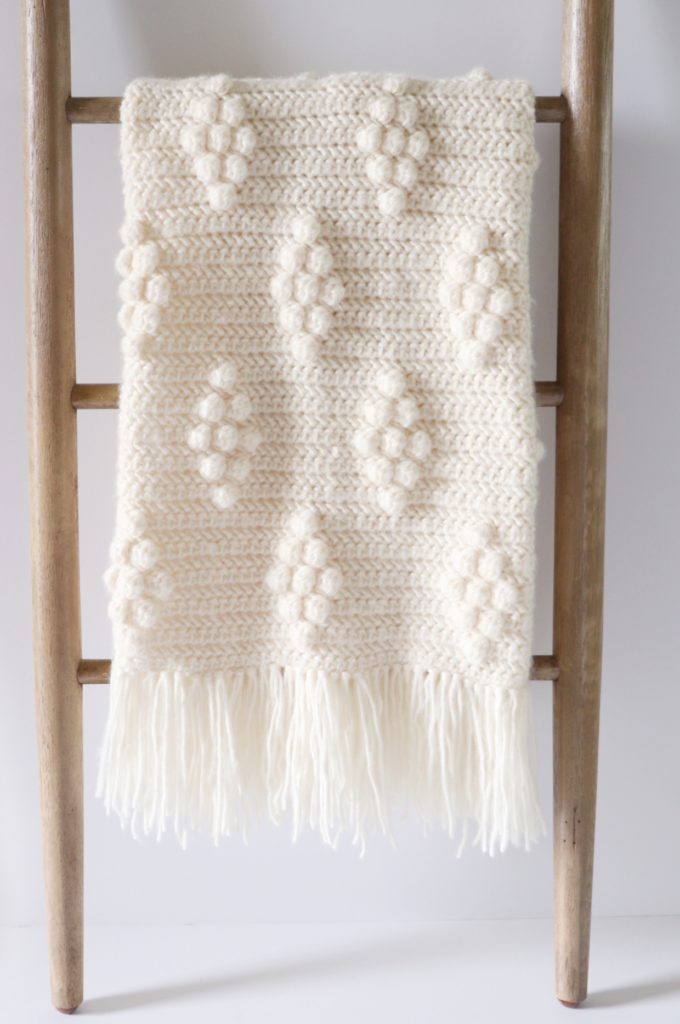
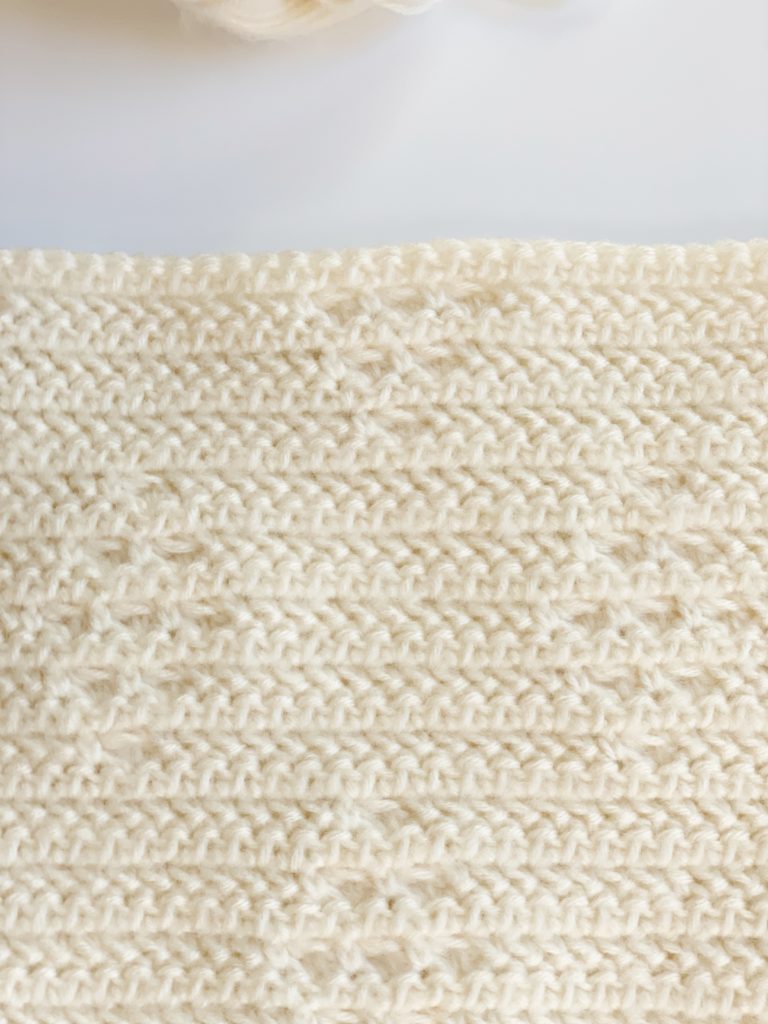
Below is a picture of the back of the blanket. I like to include this so you’ll know that the bobbles are only on one side of the blanket.
Materials
Red Heart Dreamy (100% acrylic, 250 g/8.8 oz, 426 m/466 yds)
2 skeins Ivory
Size K/6.5mm hook, scissors, tapestry needle
Size
Finished size 30 in x 40 in
Stitches
Herringbone Half Double Crochet (HHDC): Yarn over (YO), insert your hook, YO, pull up a loop and pull directly through first loop on hook. YO and pull through remaining two loops.
Double Crochet 4 Together (DC4tog) Bobble: *YO, insert your hook, YO and pull a loop back through, YO and pull through two loops. Repeat from * 3 more times. YO and pull through all 5 loops on your hook.
Pattern
Chain 80. (If you’d like to make your blanket larger, multiply any odd number by 16.)
Row 1: In the second chain from the hook, work 1 herringbone half double crochet (HHDC). Work 1 HHDC in each of the chains across the row. (79)
Row 2: Ch 1 and turn. Work 1 HHDC in each of the next 15 stitches (sts). *Double Crochet 4 together bobble (DC4tog bobble) in the next stitch. Work 1 SC into the next stitch. Work 1 HHDC in each of the next 14 sts. Repeat from * across the row.
Row 3: Ch 1 and turn. Repeat row 1.
Row 4: Ch 1 and turn. Work 1 HHDC in each of the next 14 sts. *DC4tog bobble in the next st. Work 1 SC into the next st. DC4tog bobble in the next st. Work 1 SC into the next st. Work HHDC in each of the next 12 sts. Repeat from * across the row. (You should end with 1 SC and 13 HHDC after the last bobble.)
Row 5: Ch 1 and turn. Repeat row 1.
Row 6: Ch 1 and turn. Work 1 HHDC in each of the next 13 sts. *DC4tog bobble in the next st. Work 1 SC into the next st. DC4tog bobble in the next st. Work 1 SC into the next st. DC4tog bobble in the next st. 1 SC in the next st. HHDC in each of the next 10 sts. Repeat from * across the row. (You should end with 1 SC and 12 HHDC after the last bobble of the row.)
Row 7: Ch 1 and turn. Repeat row 1.
Row 8: Repeat row 4.
Row 9: Ch 1 and turn. Repeat row 1.
Row 10: Repeat row 2.
Row 11: Ch 1 and turn. Repeat row 1.
Row 12: Ch 1 and turn. HHDC in each of the next 7 sts. *DC4tog bobble in the next st. SC in the next st. HHDC in each of the next 14 sts. Repeat from * across the row. (You should end with 1 SC and 6 HHDC after the last bobble of the row.)
Row 13: Ch 1 and turn. Repeat row 1
Row 14: Ch 1 and turn HHDC in each of the next 6 sts. *DC4tog bobble in the next st. SC in the next st. DC4tog bobble in the next st. SC in the next. HHDC in each of the next 12 sts. Repeat from * to the end of the row. (You should end with 1 SC and 5 HHDC after the last bobble of the row.)
Row 15: Ch 1 and turn. Repeat row 1
Row 16: Ch 1 and turn. HHDC in each of the next 5 sts. *DC4tog bobble in the next st. SC in the next st. DC4tog bobble in the next st. SC in the next. DC4tog bobble in the next st. SC in the next st. HHDC in each of the next 10 sts. Repeat from * to the end of the row. (You should end with 1 SC and 4 HHDC after the last bobble of the row.)
Row 17: Ch 1 and turn. Repeat row 1
Row 18: Repeat row 14.
Row 19: Ch 1 and turn. Repeat row 1.
Row 20: Repeat row 12.
Row 21: Ch 1 and turn. Repeat row 1
Row 22 to the end of the blanket: Repeat rows 2 through 21 three times.
Finishing with fringe:
Cut approximately 11 inches of yarn pieces. (You will need lots.) Use 2 strands together to fold in half and feed through the top loops of each stitch. Then open the loop and pull the tails through to secure. (Please watch video below if you need a demonstration.)
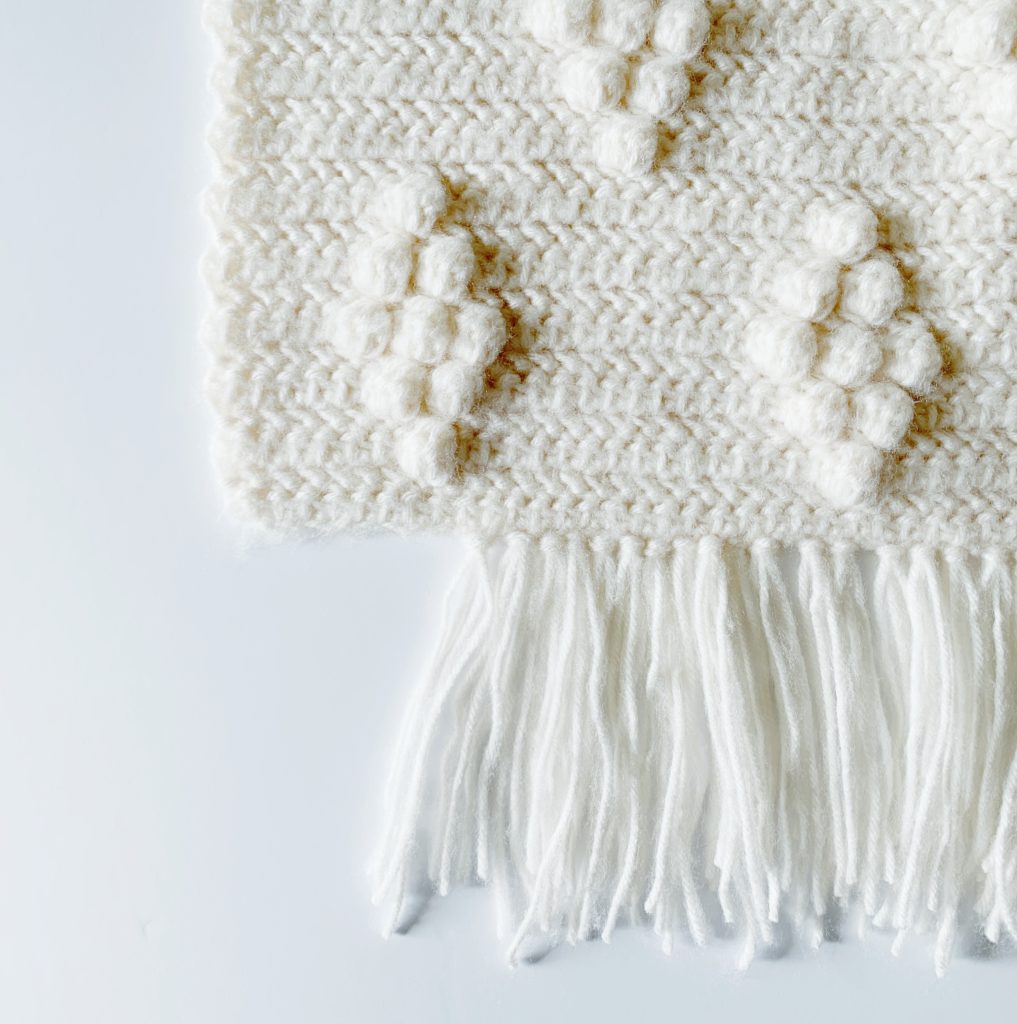
You can choose to cut the ends to even them out after they are all attached.
I found working with Red Heart Dreamy that the blanket did not need blocking. I wash the blanket in a laundry bag on gentle, then lay the blanket flat to dry.
Here is the tutorial on YouTube you might find helpful:
Thank you for stopping by our website! Come and share your blanket with us on Facebook or Instagram! We’d love to see! If you need further help, come and join our Daisy Farm Crafter Group and ask questions from other who have made the same blanket.
Happy Crocheting!
Tiffany
Click here or on image below for printable pattern