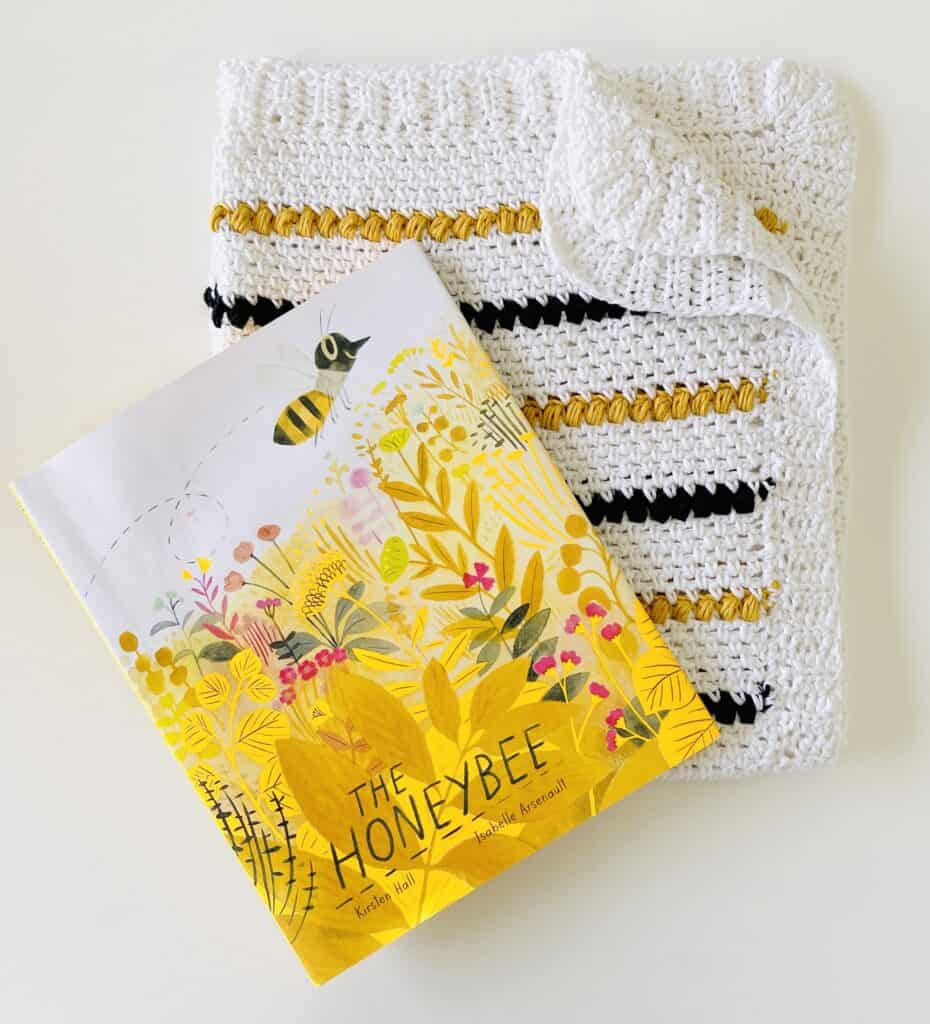
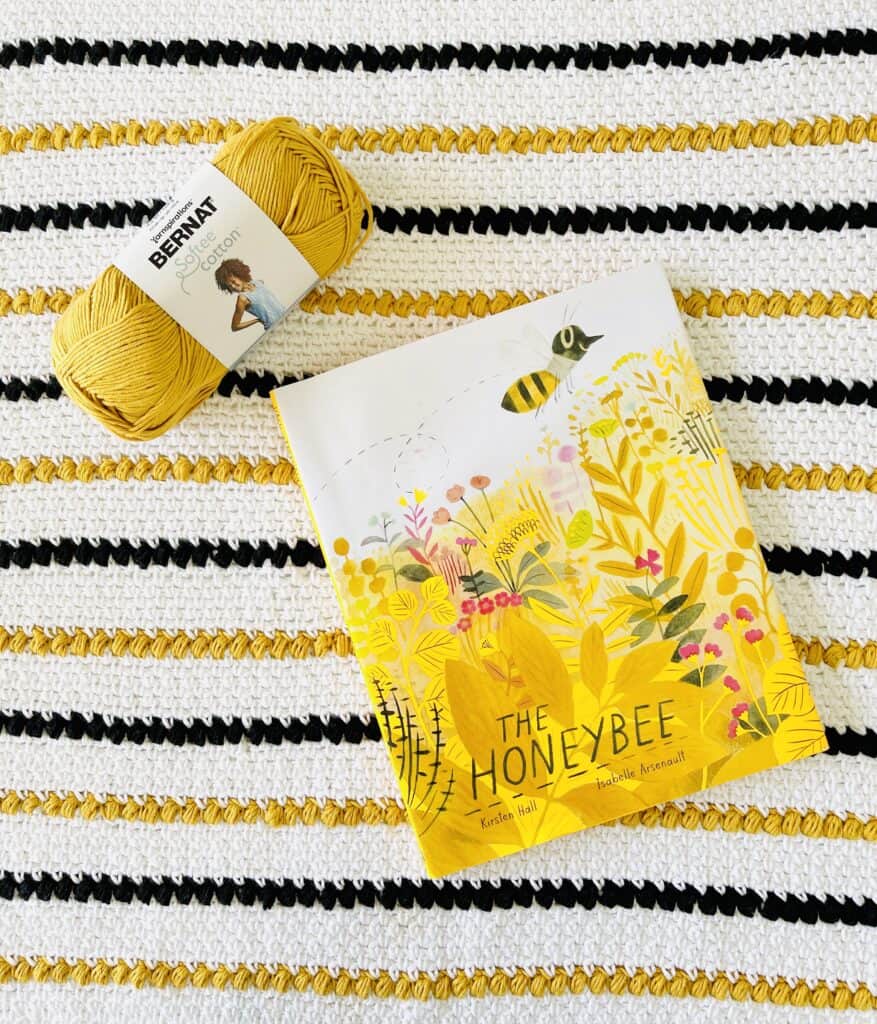
We love when we can pair a crochet blanket with a picture book for a baby shower gift! This beautifully illustrated book The Honeybee by Kirsten Hall and Isabelle Arsenault is a perfect book for a bumble bee themed blanket!
This blanket is a similar pattern to our Boho Puff Stripes Blanket, which is a combination of the moss stitch with some puff stitches. The bumble bee blanket was made with Bernat Softee Cotton, which is a cotton acrylic blend that is super soft and snuggly for babies!
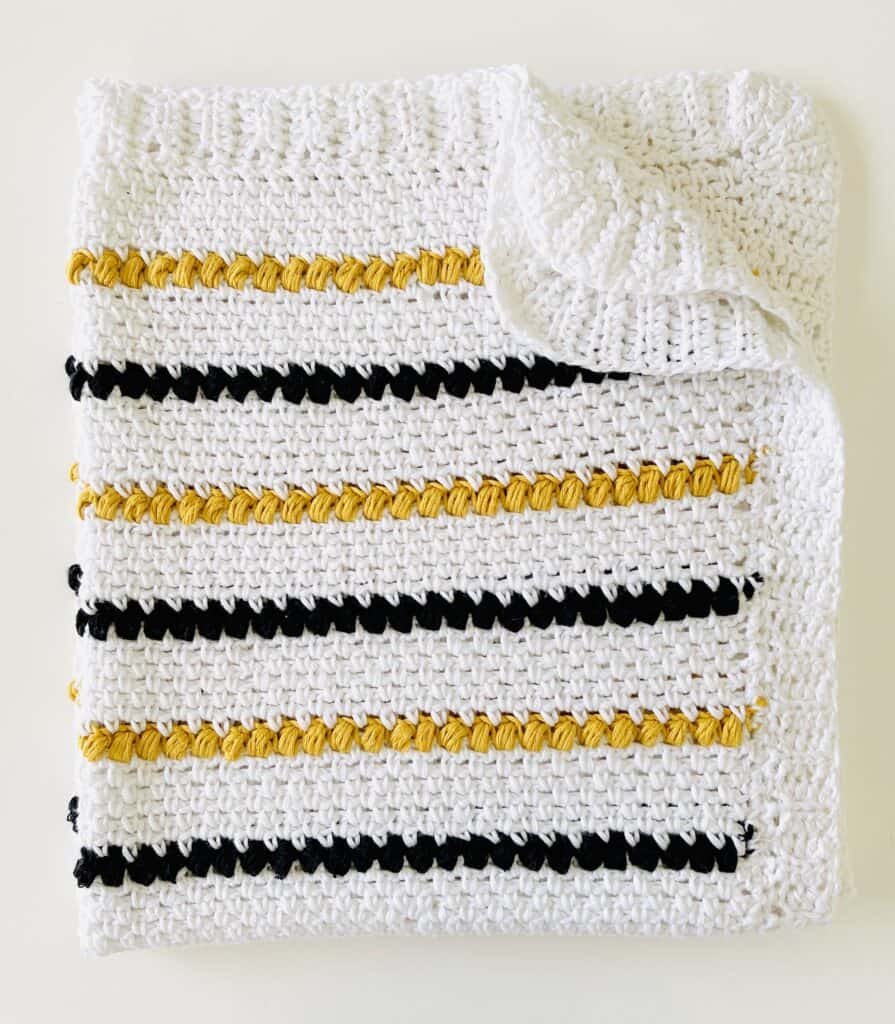
This is a stroller size blanket, so it’s a great size for baby to take on the go, but if you’d like to make it bigger, all you have to do for this pattern is chain an even number and you can make it however wide you’d like. If you do decide to make it bigger, you should have plenty of the yellow and black yarn, you’ll just need to get more of the white.
If you’d like some video help before you get started, here is a video for the Boho Puff Stripes Blanket that demonstrates that same stitches that are used in this blanket. (There is another video for the border toward the end of this post.)
Materials
Bernat Softee Cotton (60% cotton, 40% acrylic, 120 g/4.2 oz, 232 m/254 yds)
3 skeins Clear White, 1 skein Black, 1 skein Golden
Size H/5.00mm hook, tapestry needle, scissors
Size
Finished size 25 in x 30 in
Gauge 4 in = 10 st and 17 rows of pattern
Stitches
Single Crochet (SC): Insert your hook, yarn over (YO) and pull up a loop, YO and pull through two loops on hook.
Puff Stitch: *YO, insert your hook, YO and pull up a loop. Repeat from * 3 more times, inserting your hook into the same space. YO and pull through all loops.
Half Double Crochet (HDC): YO, insert your hook, YO and pull up a loop, YO and pull through three loops on hook.
Slip Stitch (SL ST): Insert your hook, YO, pull up a loop and pull directly through loop on hook.
Pattern
Chain 100 (or any even number) with Clear White.
Row 1: Starting in the 4th chain from the hook, work SC, CH 1. Skip the next chain then work another SC, CH 1. Continue working SC, CH 1 in every other chain. You should end with one SC in the last chain. CH 2 and turn.
Row 2: Work SC, CH 1 into the chain one space of the row below (in the space underneath the 4th chain from the hook). Skip the next stitch, then work SC, CH 1 in the next chain one space. Continue working SC, CH 1 into the all the chain one spaces from the row below. End with a SC that is between the last stitch and the turning chain of the row below. CH 2 and turn.
Rows 3 – 7: Repeat row 2 (moss stitch).
Row 8: Work this row in the same way you worked the previous rows, but replace each SC with a puff stitch (alternate Golden and Black for each puff row). In other words, work a puff stitch into the chain one space of the row below (the same place where you would normally work your SC), then CH 1. Then work a puff stitch, CH 1 into the next chain one space. Continue working puff stitch, CH 1 into the all the chain one spaces from the row below, except when you reach the very last space – end with a SC that is between the last stitch and the turning chain of the row below. CH 2 and turn.
Repeat rows 1 through 8 until you have 13 puff rows total, or you reach your desired length, then end with 7 rows of moss stitch to match the opposite end of the blanket. You should always have 7 rows of moss stitch in between each puff row and you should always CH 2 and turn at the end of each row.
Note: When you are working the row right after the puff row, it can be kind of tricky to see where to insert your hook, but just remember to treat those puffs as if they were single crochets and to insert your hook into the chain one spaces on either side of them, just like the regular moss stitch.
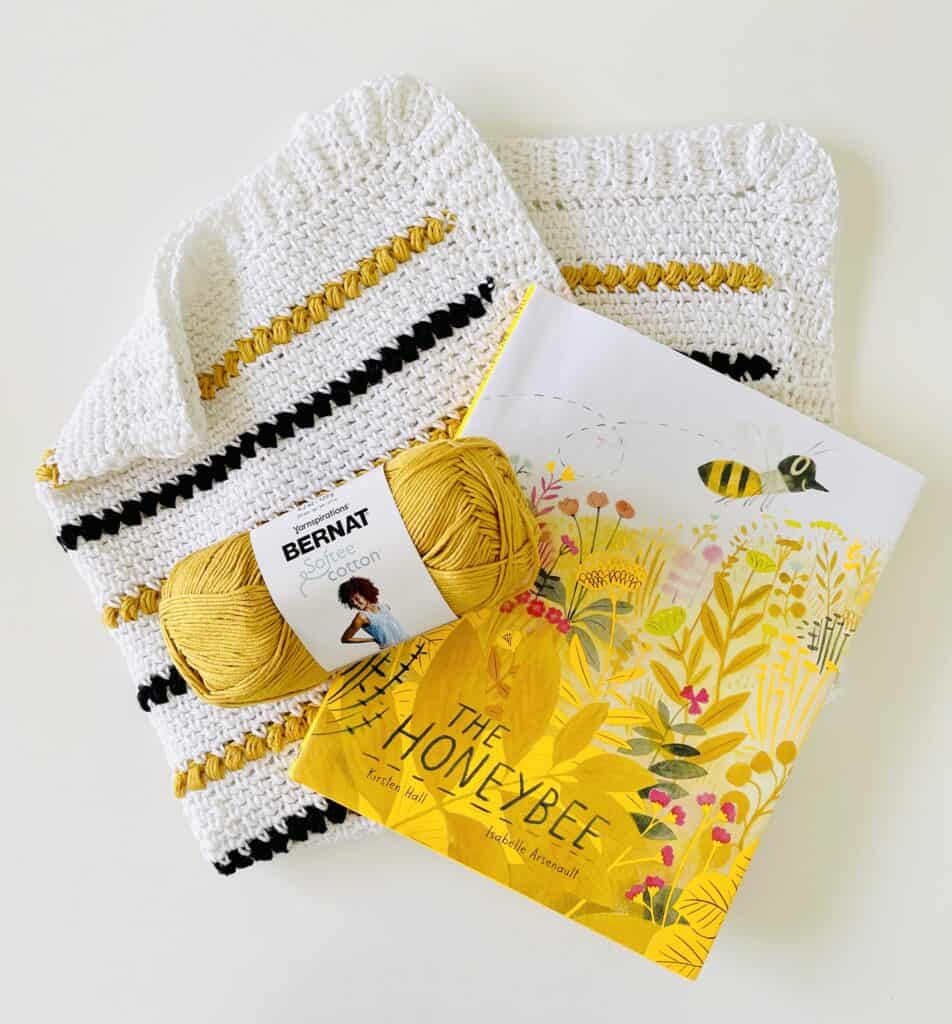
Border
Weave in all ends with a tapestry needle.
Round 1: Work 1 round of moss stitch (SC, CH 1) in every other space around the edge of the blanket. Work 2 SC in each corner (or 3 if your corner is pulling too tight).
Round 2: Continue in same direction. CH 5. Work 1 HDC into each of the next 4 chains. *SL ST into the next 2 stitches on the edge of the blanket. Turn blanket edge away from you, work 1 back loop HDC into each of the 4 HDC. CH 1 and turn. Work 1 HDC into each back loop of next 4 HDC. Repeat from * until you get to the corner.
To round the corner, first SL ST into the next stitch only once. Then, work the ribbing. Then, SL ST once into the middle stitch, work the ribbing. SL ST into the same middle stitch again. Work the ribbing and SL ST a final time into the middle stitch. Work the ribbing and then SL ST 1 time into the next stitch, work the ribbing, then resume SL ST into each of the next 2 stitches.
Continue the ribbing around the entire edge. When you return to the starting corner, finish working around the corner, then tie off and sew the bottom edge of the starting chain to the last row of ribbing. Tie off and weave in all the ends.
Here is a video tutorial for the ribbing part of this border (skip to about the 14:00 min mark):
Thanks so much for visiting Daisy Farm Crafts!
Click here or on image below for printable pattern
![]()