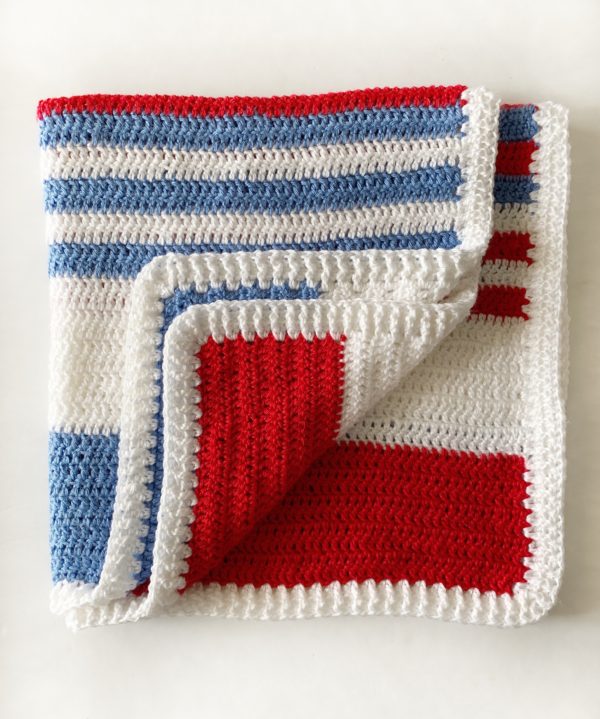
My daughter Haley has been practicing her crochet! She has made this all double crochet blanket. If you’ve figured out a few of the basics of crochet and need extra practice, this project might be perfect for you.
Bonus! I even made a video tutorial. Now those of you who have been following me along for a while will know that video making skills were something I’ve had to acquire. I’m proud to say I edited this video AND uploaded it to Youtube and here on the site without any assistance from Hannah.
(A major accomplishment for this lady (me) who went to college back in the day with only a pencil and a typewriter.)
In the video I demonstrate how to weave in ends, change colors, and work the double crochet stitch. I give you my best advice on how to end each row and keep the sides straight. It takes practice though.
Haley had to undo and redo several rows. I told her to think of this project as if she was learning to play the piano. You have to practice your scales over and over. This blanket is like that. By the end, she was very proficient at the double crochet.
I added the ribbed border and that is demonstrated in the video too.

In fact, I know some of you might be here just for that. The video is a practice swatch so you can quickly fast-forward to the ribbing edge.
My best advice for beginners is to be patient with yourself and do not make this project for someone or as anything giftable. It’s just a practice blanket to learn how to crochet. You need the time spent making the stitches for your hands to get the tension figured out.
And the beauty about crochet is that it can all fairly easily be taken out and started over. You didn’t waste a thing.
Okay, promise me you will do those things.
Materials
Caron Simply Soft (100% acrylic, 170 g/6 oz, 288 m/315 yds)
2 skeins White, 1 skein Cobalt Blue, 1 skein Red
Size H/5.00mm hook, scissors, tapestry needle
Stitches
Double Crochet (DC): YO, insert your hook, YO and pull up a loop, YO and pull through two loops, YO and pull through remaining two loops.
Front and Back Post Double Crochet (FPDC & BPDC): A front post DC means you insert your hook from front to back around the post of the next DC and work your DC. A back post DC means you insert your hook around the post from the back to the front and work a DC.
Pattern
Chain 100.
Row 1: Start in the 4th chain from the hook with your first Double Crochet (DC). Work one DC into each chain across. Ch 3 and turn.
Row 2: Start in the 2nd stitch from the hook. The chain 3 will count as your first stitch. Work one DC under the top two loops of the DC in the row below in each stitch across. Ch 3 and turn.
Row 3: as row 2.
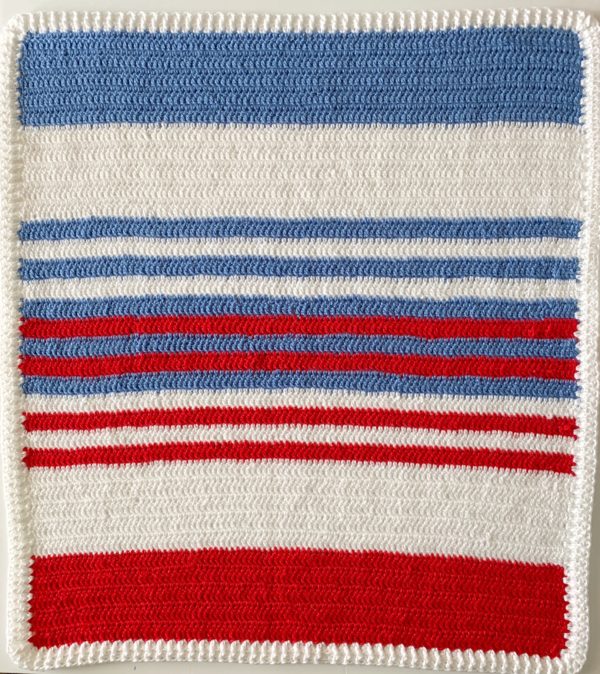
Color changes: 10 rows blue, 10 rows white, 2 rows blue, 2 rows white, 2 rows blue, 2 rows red, 2 rows blue, 2 rows red. 2 rows white, 2 rows red, 2 rows white, 2 rows red, 10 rows white, 10 rows red.
How to change colors: Just before you finish the last step of the DC stitch, lay the new color across the hook and pull through. Chain 2 and turn.
Border
After weaving in all the ends, pull up a loop in a corner where you will be working up a side first. Chain 3 in the same place as you pulled up a loop. Work 2 DC into the same place. Work down the side of the blanket placing 2 DC per row of DC.
When you reach the corner, work 3 DC into the corner stitch. Work 1 DC per stitch across the end of the blanket.
Repeat the instructions above to work the corner and back up the side and across the other end. Join with a slip stitch to the starting chain. Ch 3 and turn.
Insert your hook from the front to the back and back to the front around the post of the stitch. Work the DC as normal. Insert your hook from back to the front and back around the post to work the next DC. You are working alternating front post DC and back post DC in each stitch across the end.
When you get to a corner, in the middle stitch of the 3 DC you worked into the corners, work alternating BPDC and FPDC 3 times then continue on around the blanket as before.
Join the round with a slip stitch, chain 3 and turn. Repeat the instructions for 3 more rounds. Tie off and weave in the ends.
Here is the video, and if it doesn’t load, you can watch it on YouTube.
Thank you all for stopping by! I’m so happy that you’d like to learn crochet! Feel free to customize your DC blanket any way you wish and I’d really to be happy to share a picture with followers of the Farm on Instagram or Facebook. It is inspiring to see other’s work. Don’t be shy!
Good luck!
xo, Tiffany


