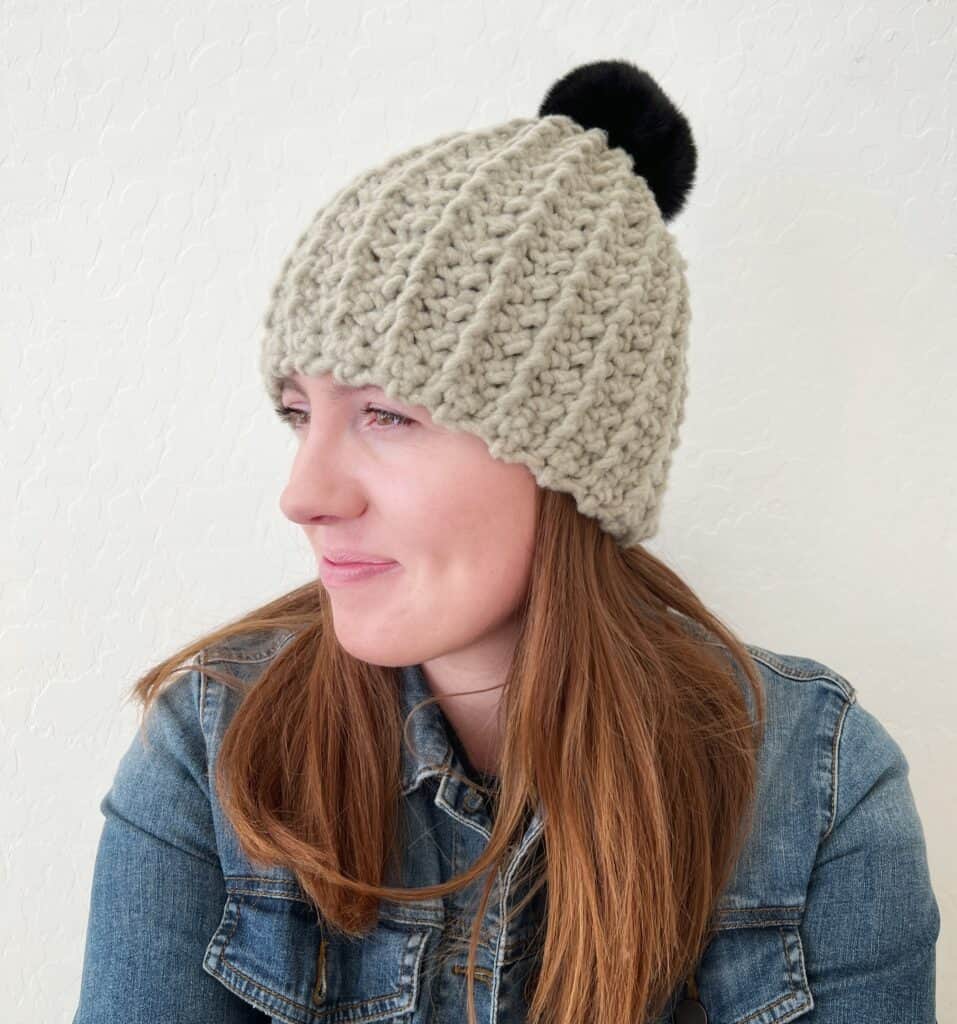
We love how these hats made with Bernat Forever Fleece are turning out. And, absolutely loving how working into the back loop for the mesh stitch elevates. The stitch definition is excellent and gives the ridges a sort of cascading twisted look.
The hats work up in just a few hours, and if you can find the pom poms with elastic, the top is finished in a breeze.
The Mesh Stitch has been a staple stitch combo for many of our patterns. It is a simple single crochet, chain one, skip-a-stitch combo that repeats across the row. And on the next row, you work the single crochets into single crochets and chain one across the chain one in the previous row. The stitches stack on top of each other and create a beautiful texture.
For this pattern, we changed it ever so slightly and worked into the back loop of the single crochet. We still chained one in between each single crochet, but each single crochet is worked into just the one loop that is furthest away from you when you are looking at the little v’s.
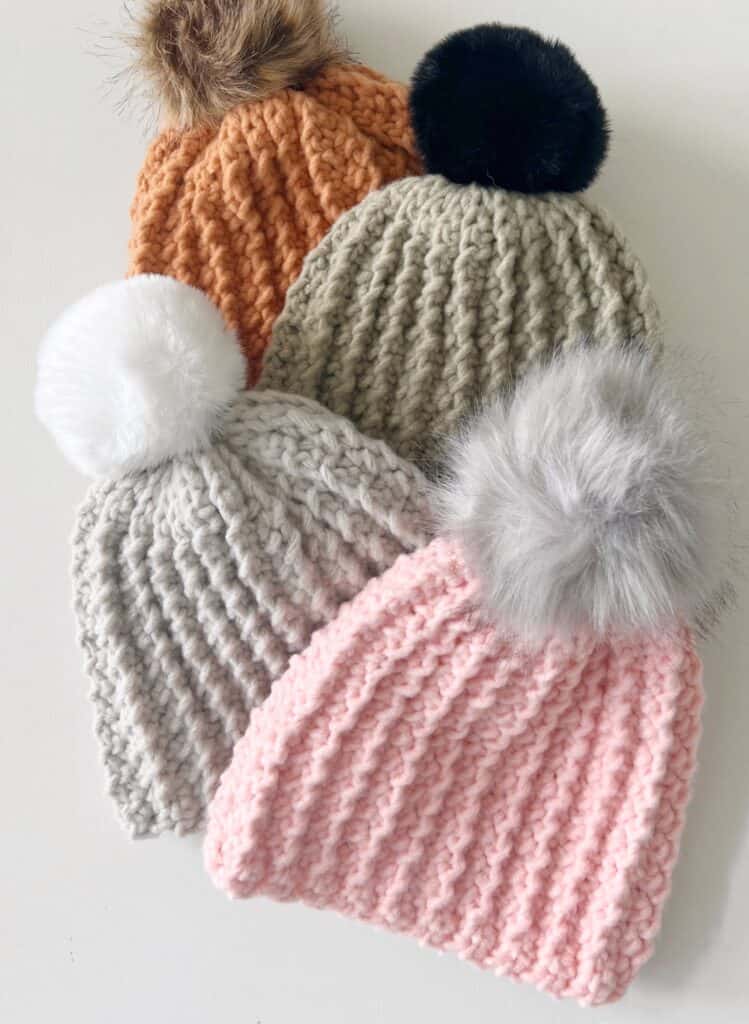
We loved the look so much we couldn’t help but try them in more shades of Forever Fleece! These shades are dear to us as we have been working with Yarnspirations to curate this special box.
Maybe, some of you already have the box and are still looking for more ideas of what to make with the yarn. We think making these hats for Christmas gifts this year is a good thing. Forever Fleece feels luxe, and each skein makes one hat. You’d have six gifts all ready to go with just one box.
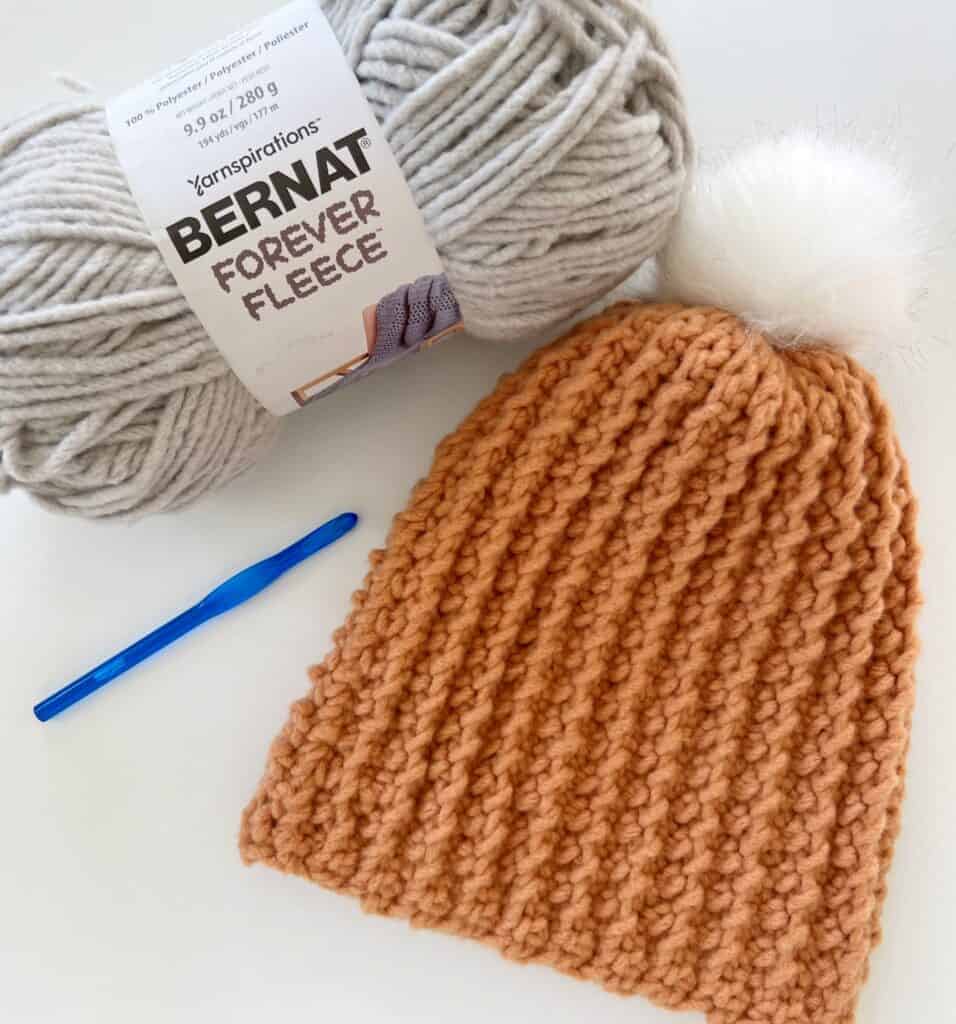
Forever Fleece is chunky and very easy to work with as well.
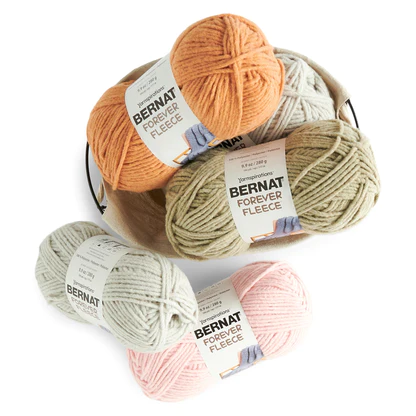
In one box you get 2 shades of a light grey, and one each of bergamot, matcha, and patchouli. It’s a very nice fall/winter combo.
Here’s a bit more information about the pom poms. I find them at Wal-mart, Joann’s or Michaels. They are just a few dollars but the best is to find the ones that have an elastic attached already.
In the video tutorial that is linked at the end of this post, I will show you how to sew a button on the underside of the hat, so you can pull the elastic through the top and twist it a few times around the button. This secures the pom pom and keeps it from being wobbly.
This also allows you to remove the pom pom if you’d like to wash your hat, and not get the pom pom wet.

I’d also like to talk you about the size. You can make this as a snug fitting beanie, or make this a slouchy hat, or anywhere in between.
For a snug fitting beanie you’d measure from the top of your eyebrows, to the crown of your head. A medium adult size is about 8.5 to 9 inches. You’d make your chain any odd number to 8.5 to 9 inches.
To make it slouchy, add 2 inches to that number. To make a wide brim, add 3 inches or maybe even 4 inches. My favorite with this yarn was to make it more like a beanie or slightly slouchy beanie.
I’ll give you a size chart and you can decide the length that you’d like to make it. For the width, you want to make it 2 inches less than the head circumference. That will allow for some stretch.
So for example, a medium adult head circumference is 22 inches, so you’d crochet the width to be 20 inches.
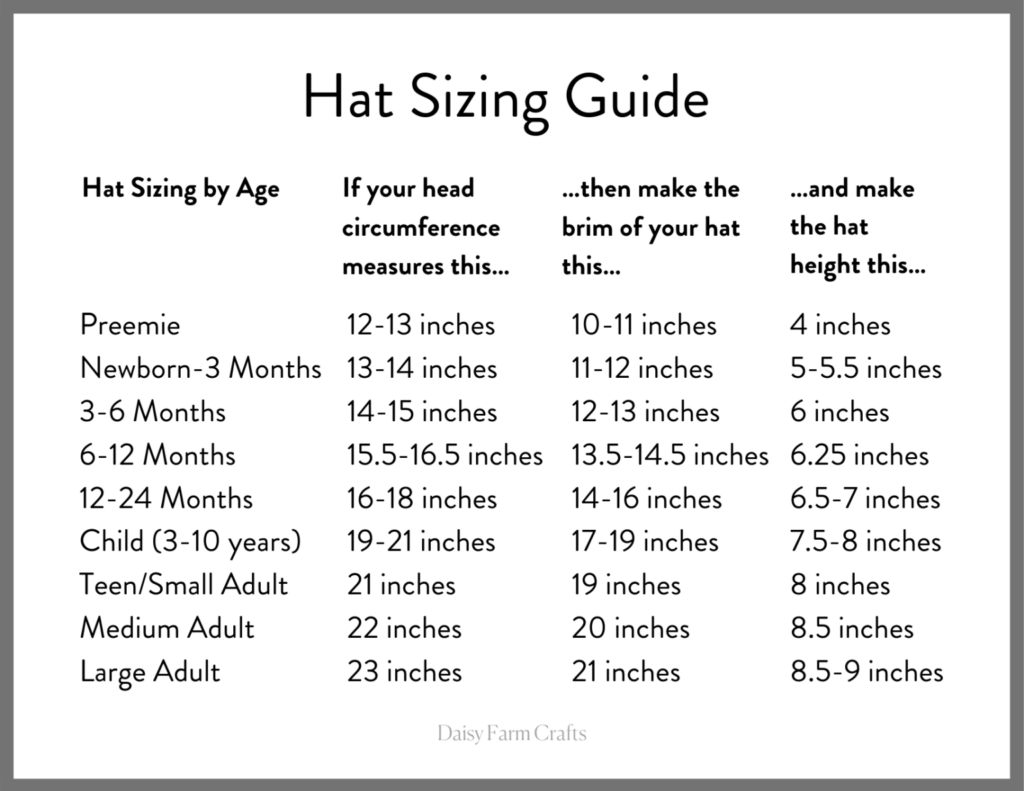
The above chart is for snug fitting beanie hats. Please add inches for the height for a slouchy look, or add inches for the amount of brim you’d like to fold up.

Good luck making your hat! Be sure and scroll to the end of the post for the free printable pdf version of this pattern if you’d like a copy.
And, if you’d like to see other hat patterns we have on the website, be sure and visit the menu heading, Hats and Headbands.
Tap here to see the menu heading Hats and Headbands
Materials
1 box of the Daisy Farm Crafts Curated Forever Fleece Box
Tap name of box for all the yarn details.
9mm hook, tapestry needle, scissors, stitch markers
Pom pom
button
Stitches
Single Crochet (SC): Insert your hook, YO and pull up a loop, YO and pull through two loops on hook.
Slip Stitch (SL ST): Insert your hook, YO and pull up a loop and through loop on hook.
Chain (CH): YO and pull through loop on hook.
Pattern
Chain 26 (Or any even number for the height of hat you’d like)
ROW 1: SL ST into the second chain from the hook and the next 2 sts. SC into the next st. *CH 1, skip one chain, SC into the next st. Repeat from * across the row until there is one chain left. SC into final chain. CH 1 and turn.
Tip: at the end of the row, the final 2 sts are SC.
ROW 2: SC under both loops of the first SC of the row. SC into the back loop of the next SC. *CH 1, skip over ch from previous row, SC into the back loop of the next SC. Repeat from * across the row until all SC are worked. SL ST into the back loop of the remaining 3 sts. CH 1 and turn.
ROW 3: SL ST into the back loop of each SL ST. Work SC into the back loop of SC, *CH 1, skip over ch from previous row, SC into the back loop of the next SC. Repeat from * across the row. Work under both loops of final SC of the row. CH 1 and turn.
Repeat rows 2 and 3 until you have the width you need. (Approximately 42 to 44 rows for adult medium)
On the last row of row 3 instructions, tie off with a long tail to use for sewing up the side and cinching in the top of the hat.
Use a tapestry needle to sew the two sides of the hat together and then weave the tail in and out of the slip stitches on the top of the hat. Work the needle a few more times around the top to further cinch it tight.
Attach a button on the underside of the hat. With a crochet hook, reach up through the middle of the hat and pull the elastic of the pom pom through. Twist a few times around the button.
Weave in all ends.
Please watch the video tutorial if you have questions:
Note, the video tutorial the starting chain is 34 for a longer hat. I mistakenly used an odd number, I didn’t catch that until the video was already loaded.
Thank you for stopping by!
Click here or image below for free printable pdf.
![]()