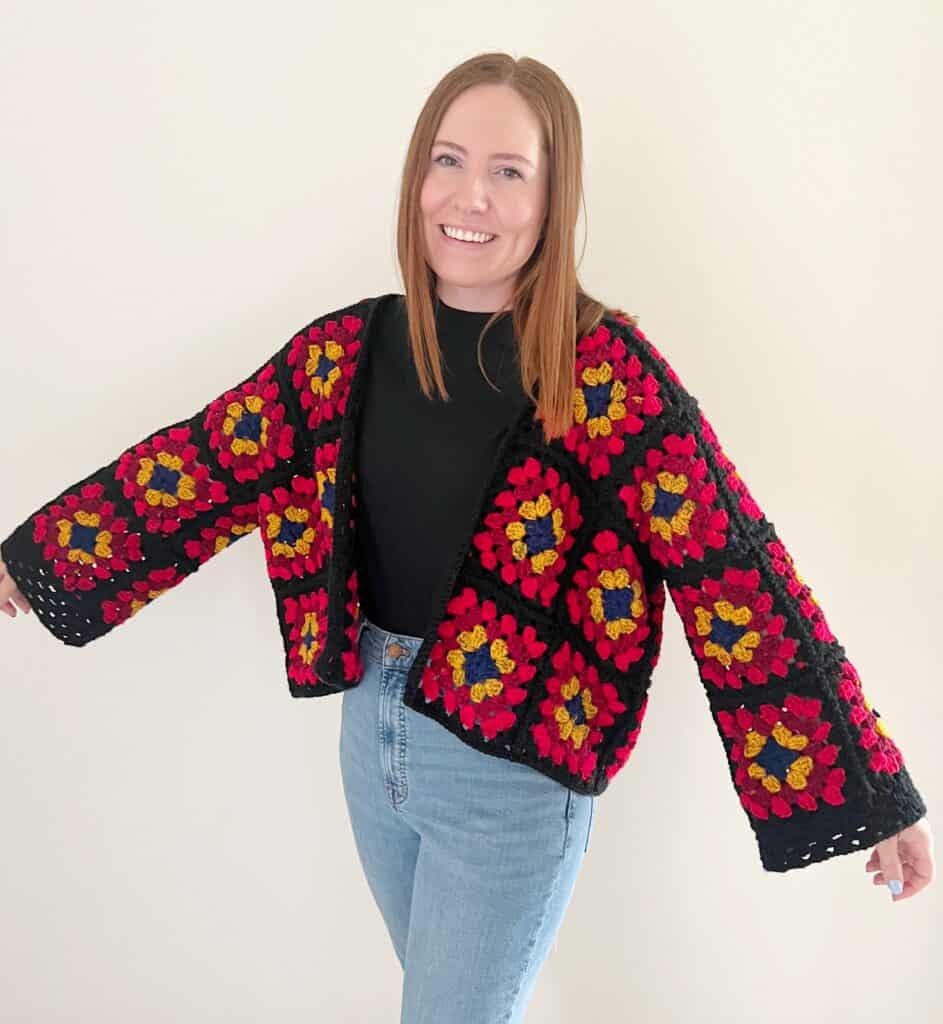
Happy Birthday to my darling Annie! She has been asking me for years to make her a crochet cardigan and I finally made it happen. If you’ve been following us, you’ll know I mainly make blankets, hot pads, hats, scarves, and an occasional pair of mittens.
In the past, whenever I finished a cute sweater for one of the grandbabies, Annie always begged me to make her one too. When Yarnspirations had me try out the Granny All in One Square yarn, I thought that this might just be the perfect project to turn into a cardigan for her and make her dreams come true.
I’m so glad I did, and so glad it’s ready for her birthday! She is heading out tonight with friends and is so excited to wear her sweater.
I’m sure you’ve noticed how popular granny squares and crochet in general is coming back into style. I have seen so many cute younger girls wearing these everywhere.
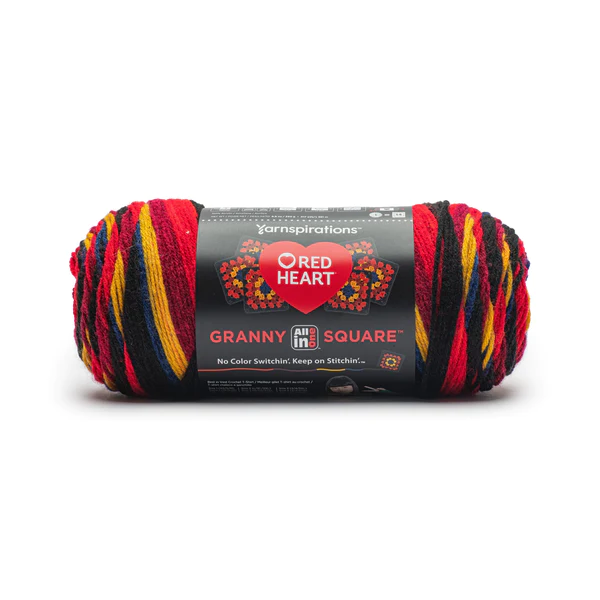
In this post today, I’m going to tell you the things I did to put this basic cardigan together. Using the Granny All in One yarn was a huge timesaver as the only ends you weave in are the starting and ending tails. There are five color changes in these granny’s and magically, the color changes when you get to the end of each round (or pretty close to it.)
Once I was able to learn my personal tension for each round, the squares came together fairly quickly. There are 14 squares per skein of yarn, I used three skeins plus 1 more from a 4th skein. If you are a smaller person, you won’t need those 3 extra squares on the back of the cardigan. If you are larger, you’ll need three extra squares.
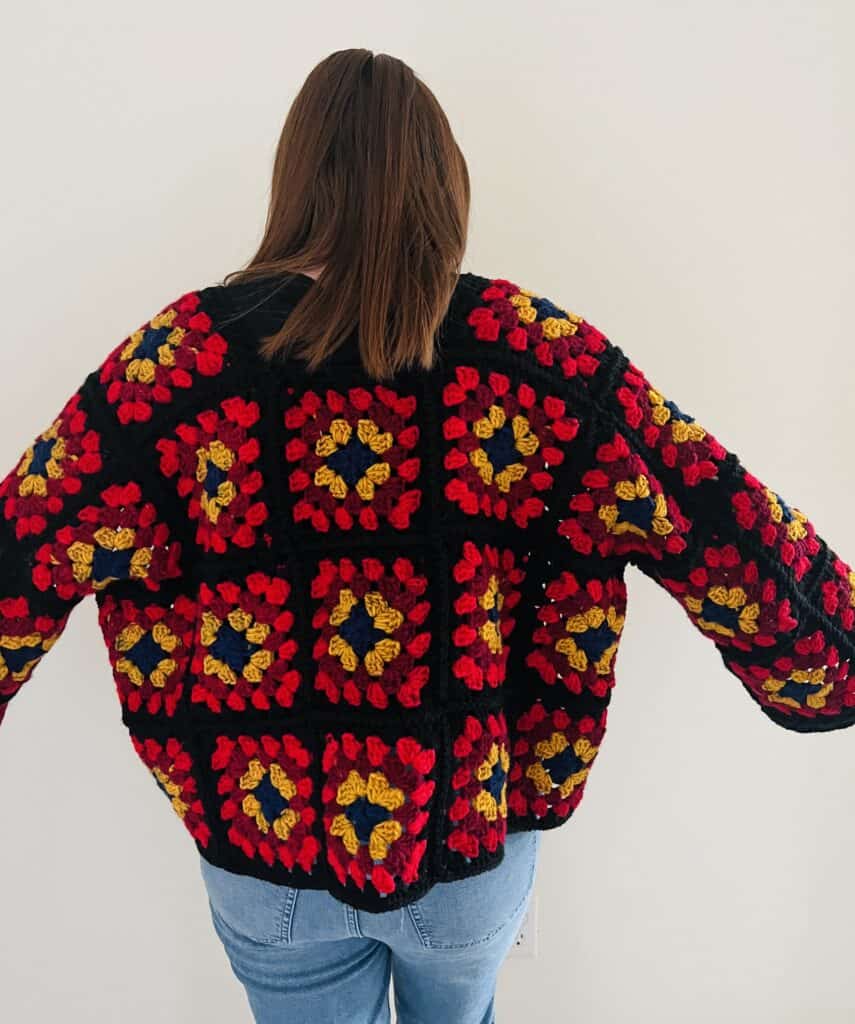
Each square is 6 inches. I used 43 squares total. I drew a diagram you can see below as to how I laid them out and joined them together. Once they are joined, you fold the cardigan in half along the shoulder and sew underneath the sleeves to the bottom edge of the cardigan.
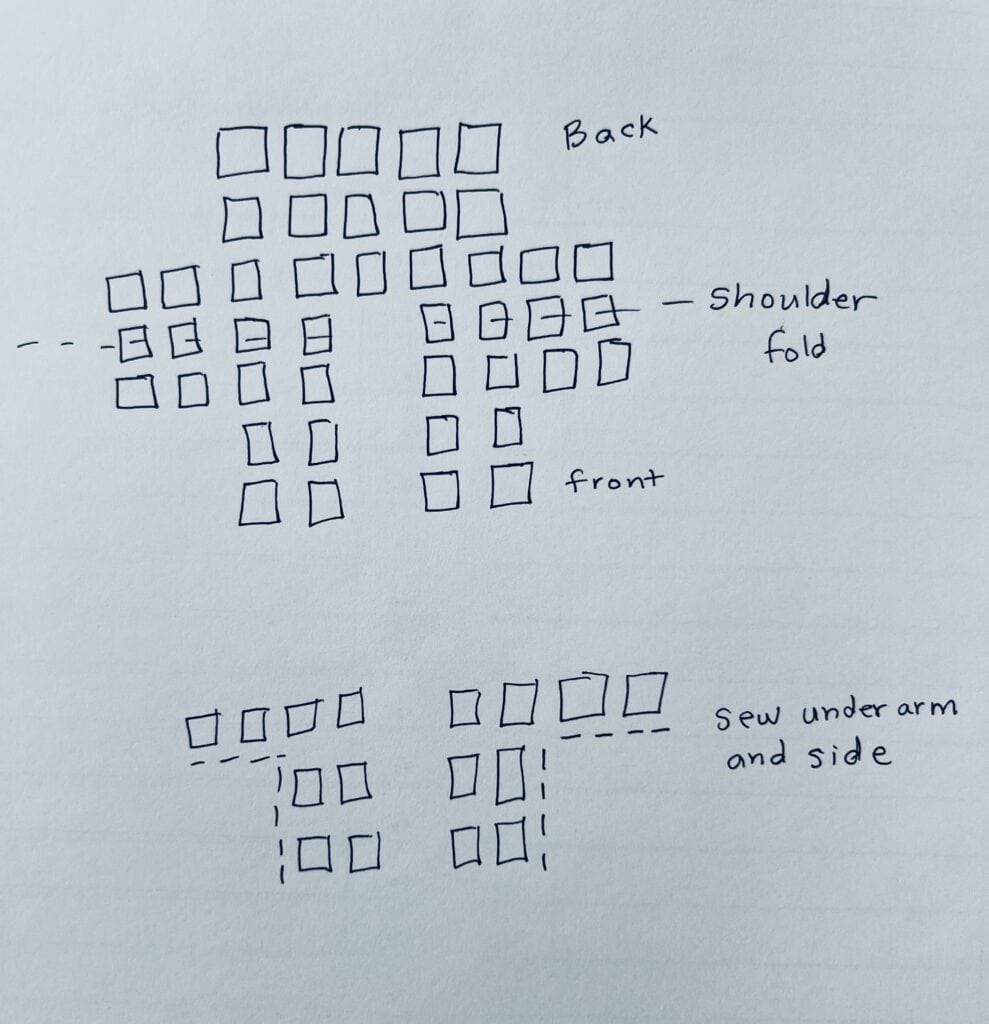
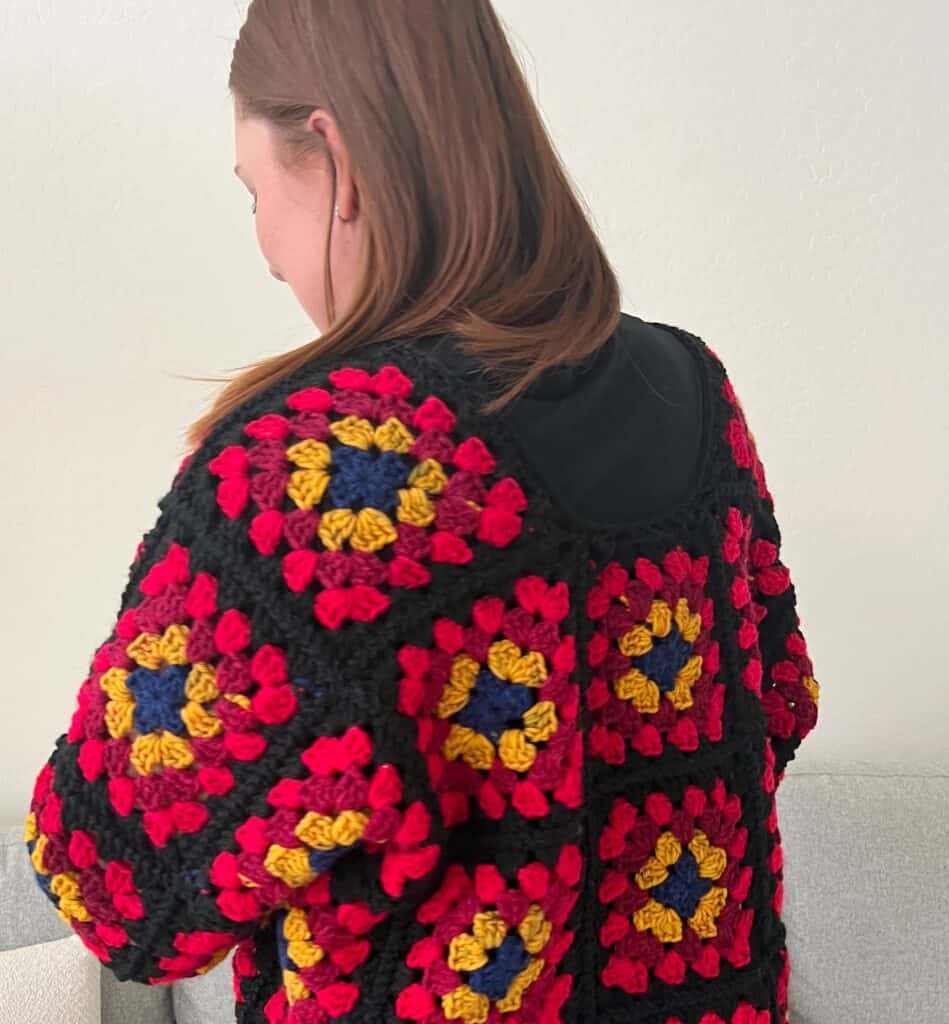
Do you see the three squares providing width across the back? That is where you would either take them out, or add another strip of 3.
The other thing I had to do is work 4 rounds of granny stitch around the end of each sleeve to add more length. Adding another set of squares made the sleeves too long, so instead, I worked extra rounds in black. You can see that illustrated in the picture below.
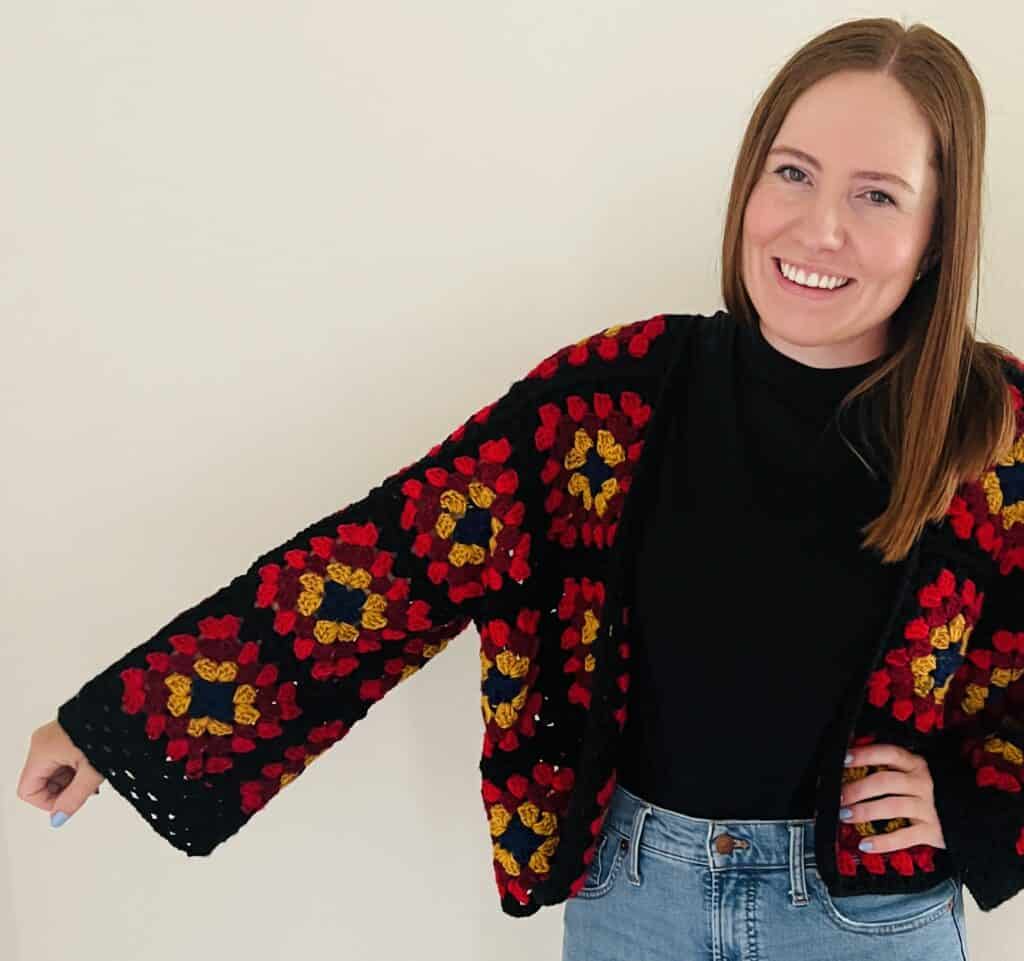
The only finishing touch I did was work another round of granny’s around the entire bottom, up the front edges, around the neck, and back around the bottom. When I worked around the neck, I decreased the width of the middle square by skipping stitches. That helped to bring the neck in a bit more to make it stay on her shoulders.
It is a slouchy cardigan and hangs down in the back a bit. You can see that better in this picture:
The technique I used to sew or join the squares is a video from my friend Sarah at Repeat Crafter Me. I fell in love with this joining method, I’m starting to use it a lot when I need to join anything. It’s a modified version of a slip stitch, and once you have the hang of it, you’ll love the braided look of it. It’s called the Zig Zag join.
Here’s Sarah’s video clip for a quick tutorial.
The pattern for the granny squares is printed on the inside of the yarn label. Or I have previously made a tutorial when I was learning how to use this yarn. I show you some tips and tricks to get the color changes to work out, but honestly, once you get going, you’ll learn your own personal tension and what works for you.
The color I used for Annie’s cardigan is called Moody Cherry, if it’s sold out on Yarnspirations.com, you can find it at Joann’s or it will be coming to Walmart this summer.
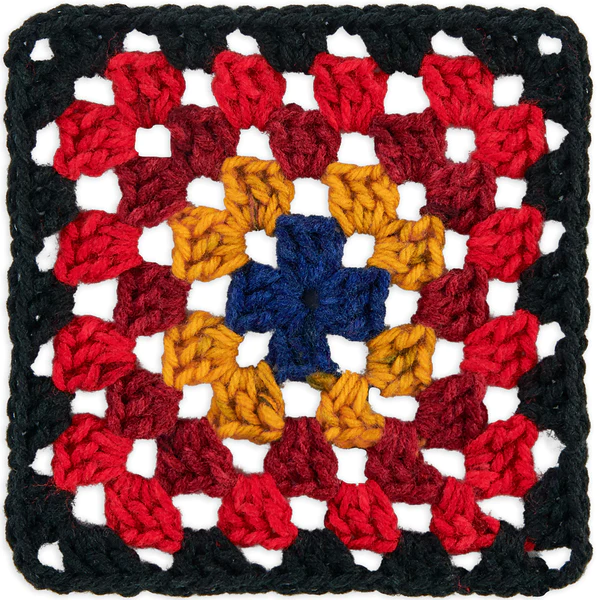
I really didn’t get overly concerned that the color changes need to be exact. I would often times have the first chain sequence of the next round be fading into the next color. I think as you can see from the finished cardigan, you really can’t see any of those color changes.
Here’s my video tutorial of the squares if you need it:
Good luck on your cardigan. I’m making one for baby Kate! Elizabeth fell in love with Annie’s cardigan and wanted one for Kate, so I will have a baby-sized one coming soon!
And happiest of birthdays Annie! You have been such a good Daisy Farm model through the years!
Annie also runs our Daisy Farm Kitchen website and bakes so many delicious treats for us. She is the baby of the family and an absolute joy to everyone she meets.
XO, Tiffany