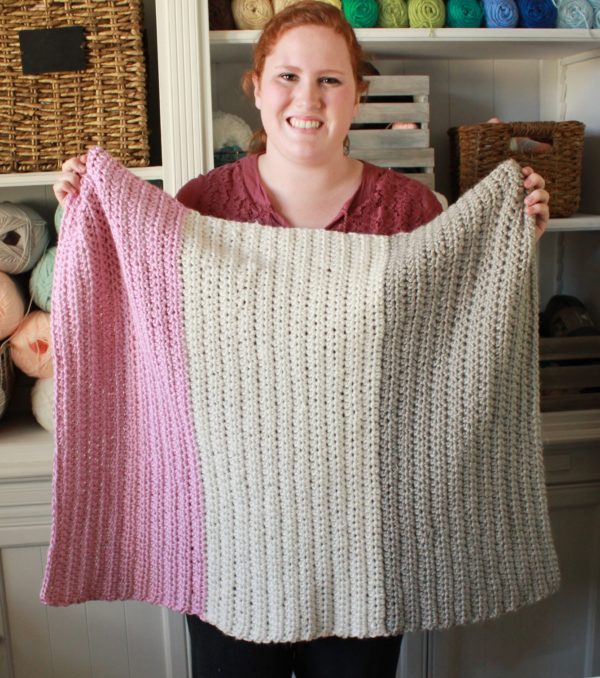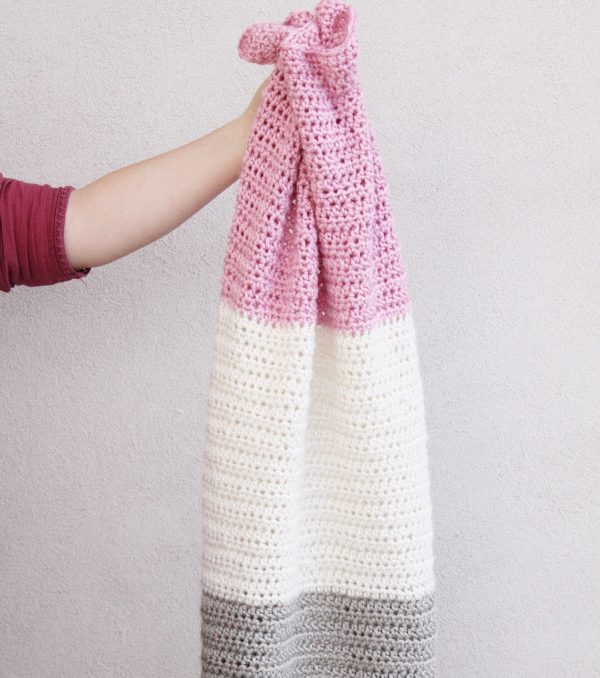
This is my daughter Haley showing her very first crocheted blanket that she made to the world! (Well, our beautiful crochet world! And I am so proud of her! She never was interested in learning crochet as a young girl, (she is 20 now) she gravitated more toward sewing. She did not have an interest in crochet at all.
But as she just returned from serving a mission in Billings, Montana, I think her interest in making warm items for cold weather was piqued!
I had her follow my 5 tips for beginning crocheters and we set off on designing a great beginner project. She used the tips exactly and had great success.
I’d like to talk about the yarn she used for this project and give it my recommendation if you are needing to order online. This is Bernat Softee Baby Chunky brand from Yarnspirations.com.
(Did you know Yarnspirations is the website that sells Caron, Bernat and Paton’s brands of yarn? You also can buy those brands at JoAnn’s, Michael’s or Wal-mart, but this type of Softee Chunky was only sold at JoAnn’s. We ordered online.)
We loved the updated colors in the line, and she loved how soft and easy it was to use. This was a chunky weight yarn, so it was easy for her to see the stitches she was making.
Grab a size K or L size hook. You’ll want to have the two sizes to work your sample swatches with so you can see the difference they make. You’ll be able to tell if your blanket is too loose and floppy, or so tight it’s like a doormat. You want to land somewhere in between. You could even buy a J size hook to see what you think as well. Every one crochets differently and tension is really up to you. So different hook sizes help you to get everything just right. (Tip: the higher up the alphabet the bigger the hook. i.e. E, F, and G, are smaller.)
Don’t forget to have a pair of scissors handy and you’ll want a tapestry needle, or yarn needle, to weave in ends. Look for the needle that has the blunt type edge. Not sharp, and a big eye so the yarn threads through easily.
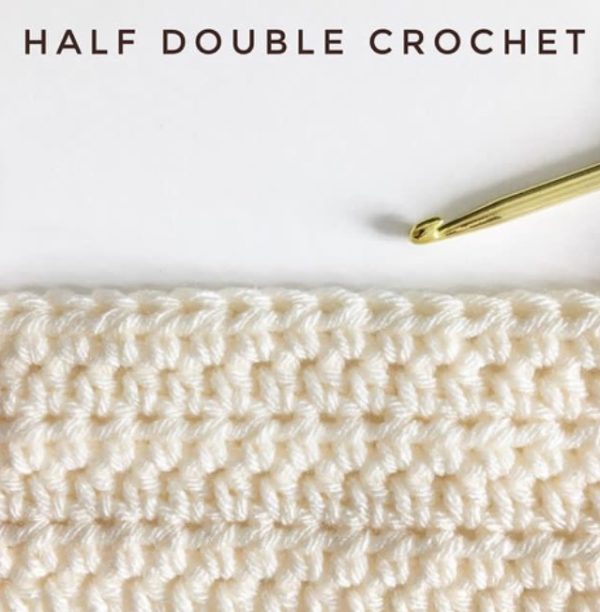
Here is the half double crochet stitch you will use for this blanket:
You’ll want to practice a swatch of this stitch. Start with 12 chains. In the 3rd chain from the hook, work HDC into each stitch across. When you get to the end, CH (chain) 2 and turn. This chain 2 does not act as a stitch. It simple adds height to get you up to the next row. So work your first stitch into the first HDC of the row below. If you stop and count, you should have a swatch of 10 stitches. Keep working rows and stay consistent with 10 stitches. See if you can get comfortable turning the work before you move on to making the blanket.
You’ll want to practice changing colors as well. How to do that is just before you complete the HDC in the last row you are using a color, pull through with the new color. Simply lay the new color of yarn over your hook and pull it through leaving a tail to weave in later.
I’ve put together a little video clip if you are more of a visual learner that essentially says and demonstrates all I have said so far.
So now let’s get to the pattern!
Materials
Bernat Softee Baby Chunky (100% acrylic, 5 oz/140 g, 155 yds/142 m)
2 skeins each Cozy Gray, Tutu Pink, Cream
Size K/6.5mm hook, tapestry needle, scissors
Stitch
Half Double Crochet (HDC): Yarn over (YO), insert your hook, YO and pull up a loop, YO and pull through three loops on hook.
Pattern
Chain 62 in Cozy Gray. HDC (symbol for Half Double Crochet) in the 3rd chain from the hook and in each CH (chain) across the whole row. CH 2 and turn. (60 HDC)
Rows 1 – 22: Work HDC in each stitch for 22 rows. Change color to cream or white in the last stitch of the 22nd row. CH 2 and turn at the end of each row.
Rows 23 – 44: Work HDC in each stitch for 22 rows, Change color to Tutu Pink in the last stitch of the 44th row. CH 2 and turn at the end of each row.
Rows 45 – 66: Work HDC in each stitch for 22 rows. CH 2 and turn at the end of each row. Tie off when finished and weave in all ends.
To weave in ends, thread your tapestry needle and simply insert the needle in and around stitches of the same color. You want to go back and forth, in and out several times. Then cut off close to the fabric and hide the yarn. You want to have your tails at least 9 inches long to give you enough to sufficiently weave in an end.
A final thought about borders and why I did not include one in this project. If not done properly, a border will gather and ruffle your blanket and make it look unprofessional. If you have done a good job turning your work, a simple project like this looks just fine. Finding the exact stitch to work into on the side of a blanket requires more practice and this project is meant to be a starter point.
Also, if you have had this blanket in and out of project bags, or it took awhile to make it, feel free to hand wash it and lay it out to dry before giving away. You also can reshape it and let it dry and it will look amazing.

I hope you really enjoy your first crochet project as much as Haley did! She’s hoping like the rest of us here on the farm that maybe one day these blankets will be for grandbabies! Certainly one of these 5 kids of mine will elevate me to grandma status I hope!
I’d love to share your finished project, so feel free to share to my wall on Facebook, or tag me on Instagram.
xo, Tiffany

