Our little Jack is growing like a weed. We have loved getting to learn his little personality. He is so observant of everything around him and loves to focus on one thing at a time. He especially loves looking at books! Which is awesome because I love making blankets to go with books!
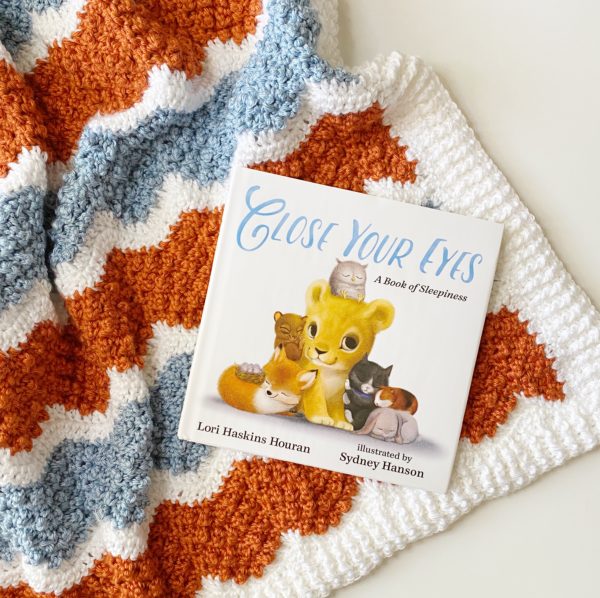
And I have an adorable one to share with you today! Several months ago, Lori Houran, the author of this darling book CLOSE YOUR EYES reached out to us to let us know that she was a crocheter and has made blankets from our patterns.
She was excited that my grandma dreams had finally come true and wanted to send Jack a copy of her newest book.
She sent three!
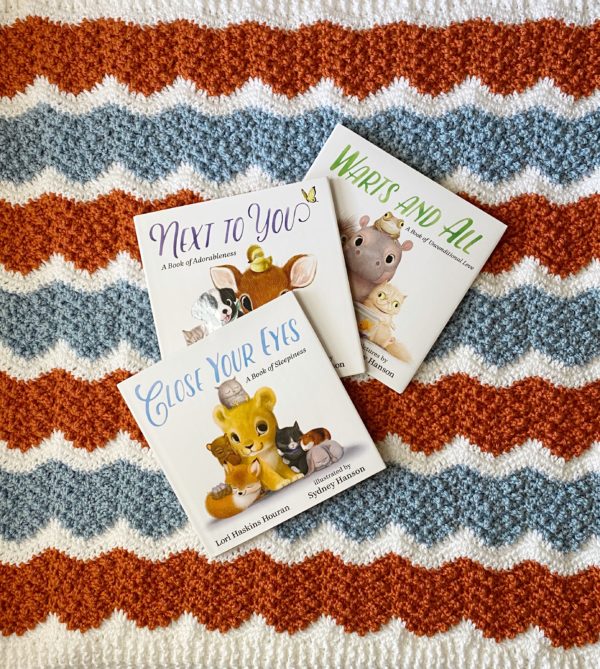
And let me tell you, they are so so cute! The story and illustrations of the different animals engaged Jack and I can’t wait to read them all to him.
Also look at this darling feature, there is a spot on the inside cover to write the name of who the book is for.
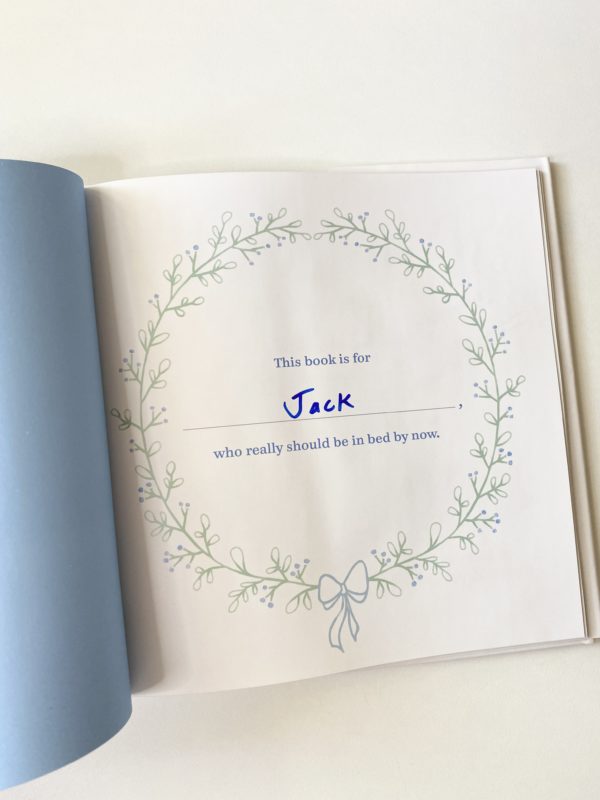
ADORABLE!
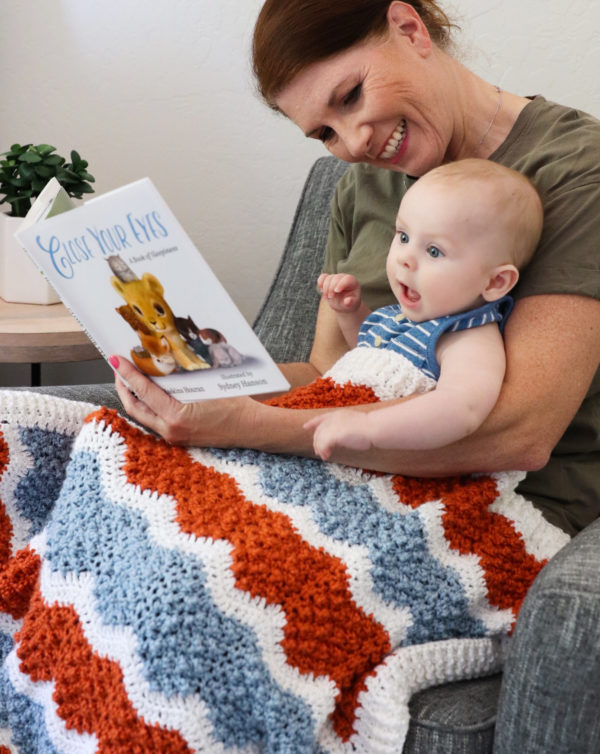
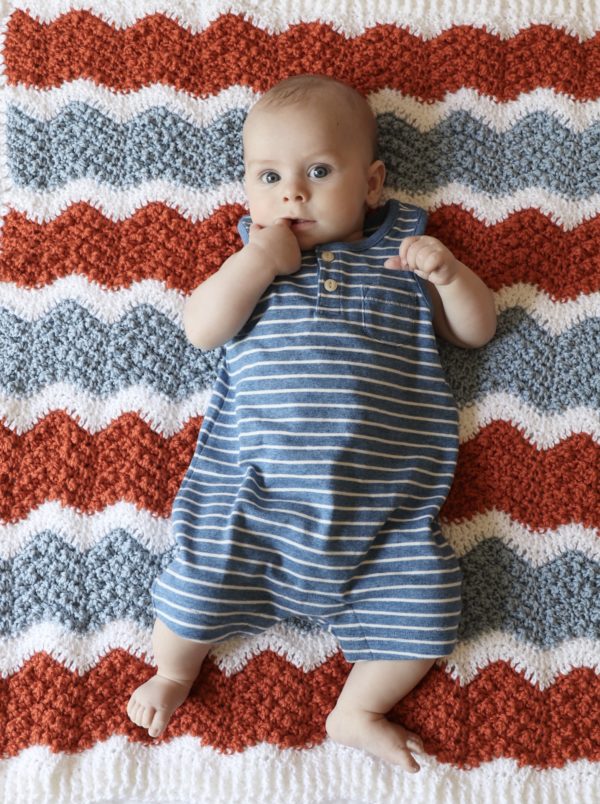
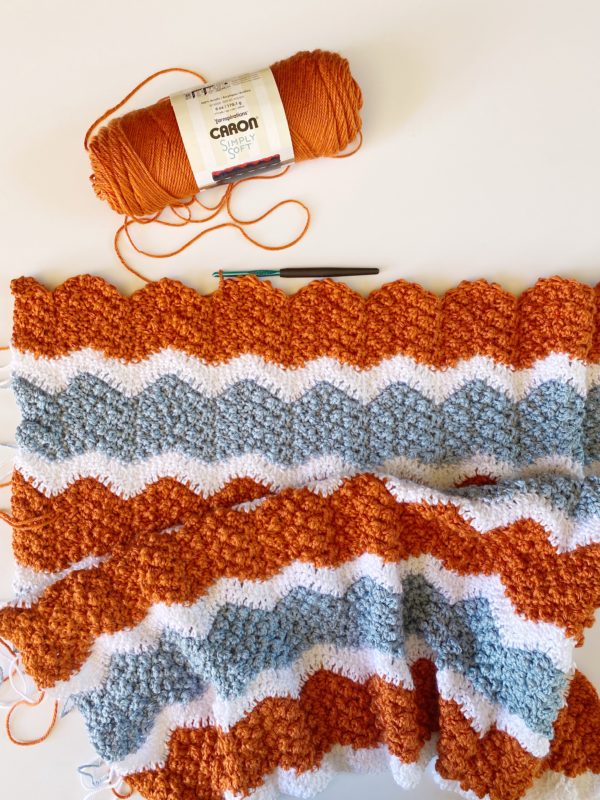
I got right to work on a blanket to go with the book choosing a few colors on the front of the book as my inspiration. I also wanted the blanket to be a bit puffy and full of texture.
I modified our simple ripple pattern and came up with this Ripple Crunch. I hope you love it as much as me!
To purchase Lori’s book on Amazon click the name of the book here: CLOSE YOUR EYES
Materials
Caron Simply Soft (100% acrylic, 170 g / 6 oz, 288 m/315 yds)
3 skeins White, 2 skeins Pumpkin, 2 skeins Light Country Blue
Size H/5.0 mm hook, tapestry needle, scissors
Size
Finished size 34 in x 34 in
Stitches (US Terms)
Single Crochet (SC): Insert your hook, pull up a loop, then yarn over and pull through two loops.
Double Crochet (DC): YO, insert your hook, YO and pull up a loop, YO pull through two loops on hook, YO pull through remaining two loops.
Treble Crochet (TR): YO twice, insert your hook, YO and pull up a loop, YO and pull through two loops, YO and pull through two loops again, YO and pull through remaining two loops
Chain (CH)
Pattern
Pattern repeat is any number times 12 plus 3. However, I highly recommend beginning this blanket with a foundation double crochet.
Row 1: 120 Foundation Double Crochet, the first chain 3 of the foundation crochet counts as a stitch. Chain 3 and turn.
Row 2: 1 DC into the first stitch. (or 4th chain from the hook if using a chain) *1 DC into each of the next 3 stitches. [DC2TOG across the next 2 stitches] 2 times. 1 DC into each of the next 3 stitches. 2 DC into each of the next 2 stitches. Repeat from * across the row end with working 1 DC into each of the last 3 stitches and work 2 DC into the top of the turning chain. Pull through with new color in the last step of the last DC, ch 3 and turn.
Row 3: 1 DC into the first stitch. 1 TR, 1 SC, 1 TR into each of the next 3 sts. *[SC2TOG across the next 2 sts] 2 times. 1TR, 1 SC, 1 TR into each of the next 3 sts. [1 SC, 1 TR] into each of the next 2 sts. 1 SC, 1 TR, 1 SC into each of the next 3 sts. Repeat from * across the row, ending the row with 1 TR, 1 SC, 1 TR in the next 3 sts and 2 DC into the turning chain.
Rows 4 – 10: Repeat Row 3 instructions. Change color to white at the end of row 10.
Rows 11-12: Repeat Row 2 instructions. Change color to light country blue at the end of row 12.
Rows 13-20: Repeat Row 3 instructions.
Continue repeating the rows until you have 7 sections of colored rows (or to however many rows you would like).
For the last row of white, work 1 DC into each stitch instead of following row 2 instructions. (This will mirror your foundation chain row.)
Border
Before beginning, I’d like to explain my thinking on how to get this border started. First you’ll want to add two rows of double crochet on each side of the blanket to have it even out and match the bottom and top of the blanket.
Then you need to make corners of DC, CH 1 DC, but sometimes you will be working around the sides of stitches (posts) or tops of stitches. This can be confusing and in the video I made I was even confusing myself! lol!
But I’ve been thinking about a better way to start the border after you make the two rows of DC on the sides. I wish I would have done a round of SC with 3 SC into each corner, and if you are working around the side of a post stitch on that round work 2 SC around them. Then join, ch 3 and work a round of DC into each SC and in the corner stitches work DC, CH 1 DC. Then on the next round begin your front and back post DC alternating, and then work DC, CH 1 DC around each ch space.
The video I made will show you how to do the ribbing, but I didn’t do a round of SC first and I wish I had in place of round 2.
First Round
With white, continue working in the same direction. Work 3 DC into the top of the turning chain. Rotate your blanket to work down the side. (Take time to mark this stitch and weave in the ends before continuing.)
First Side: After ends are woven in, work 2 DC per the end of each row. Work 1 DC into the end of the side, ch 3 and turn. Work 1 DC into each DC. (Ch 3 counts as first stitch of the row.) Slip stitch into corner DC and tie off.
Second Side: Pull up a loop into the top of the turning chain in bottom right hand corner. Ch 3. Work 2 DC around the end of each row. Work 1 DC into the corner, ch 3 and turn. Work 1 DC into each DC (Ch 3 counts as the first stitch of the row. Slip stitch into corner DC, tie off.
Second Round
First side: Pull up a loop in lower right hand corner where there is a ch 3 turning chain. Ch 3. Work DC around the sides of the posts until you come to a DC. Alternate Front Post Double Crochet (FPDC) and Back Post Double Crochet (BPDC) around each DC across the row. Work 2 DC around the side post, ch 1 and slip stitch to the chain 3. (This makes the corner and rotate to the next side.)
Second side: Continuing in the same direction, alternate FPDC and BPDC around each DC. When you reach the corner, in between the DC of the row below, work [DC, CH 1 DC].
Third side: Work DC around the sides of posts until you reach the DC of the row below. Alternate FPDC and BPDC around each DC. Ch 1 and Slip stitch to the top of the next stitch on the next side to make the corner.
Fourth side: Alternate FPDC and BPDC around each DC. After final post stitch, work 1 DC, ch 1 and slip stitch to starting ch 3. Continue in same direction.
Third Round
Work FPDC around FPDC in the row below and BPDC around BPDC in the row below. In unworked DC, look ahead to next post that is worked and count back to make the alternating pattern consistent and work either FPDC or BPDC around those DC. Work 1 DC, Ch 1, 1 DC around each ch 1 space in each corner.
Fourth and Fifth Rounds
Work as third round, no need to turn the rounds or join. End the last round with a slip stitch into the first st and tie off.
Thank you so much for stopping by! I hope you enjoy this pattern and come and show us if you make one. We love to see. You can tag us on Instagram with #daisyfarmcrafts or by joining the Daisy Farm Crafters Group on Facebook.
xo, Tiffany
Click here or on image below for printable pattern