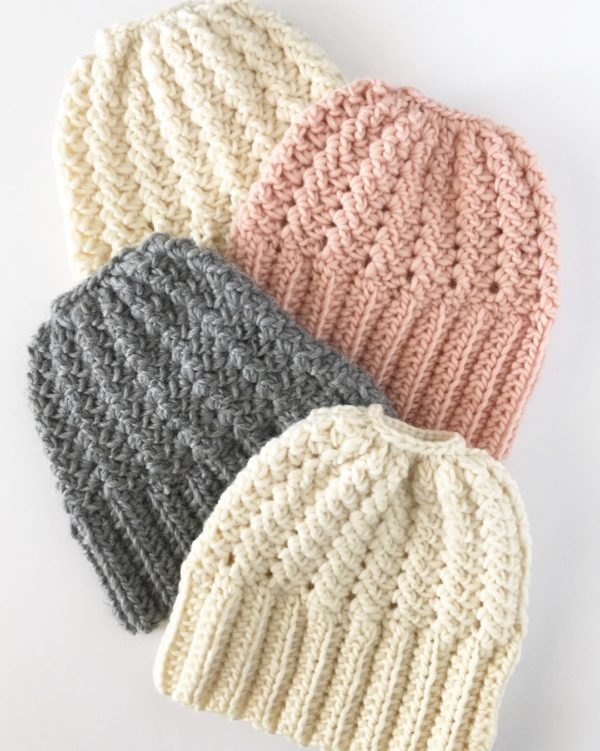
I don’t know why I didn’t think of it earlier, but of course the Sprig Stitch Bun Beanie needed matching mittens in order to complete the look! So here I am, a few days before Christmas, making matching crochet sprig stitch mittens to go with a few hats I’ve made as gifts. The pattern for the beanie is here.
Trust me, these are so easy to put together and you can make two of them fast. I start with the ribbing at the wrist and then start the sprig stitch and end by gathering the top.
Now, this also is my first time including lots of video clips to help my visual only learners! I hope that this can help you out a lot. The videos are at the end of this post and each video follows what I explain. So you might want to read through everything and watch before you start on these crochet sprig stitch mittens.
Also, as with all my patterns, I will include a link at the end for a PDF download that you can buy from Etsy. And thank you if you choose to do that! I am so appreciative.
I also want you to know that if you love this pattern and you are a maker, feel free to sell what you make. The more handmade crochet items in the world the better in my mind!
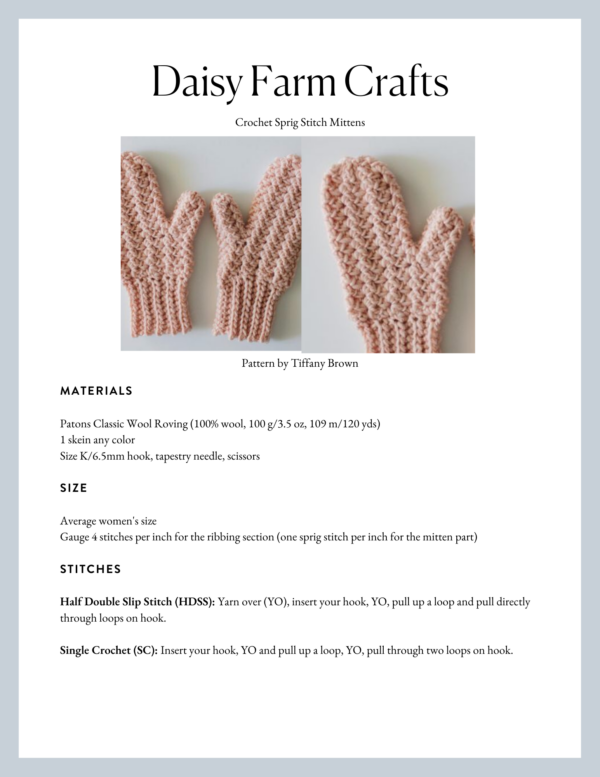
Materials
Patons Classic Wool Roving (100% wool, 100 g/3.5 oz, 109 m/120 yds)
1 skein any color
Size K/6.5mm hook, tapestry needle, scissors
Size
Average women’s size
Gauge 4 stitches per inch for the ribbing section (one sprig stitch per inch for the mitten part)
Stitches
Half Double Slip Stitch (HDSS): Yarn over (YO), insert your hook, YO, pull up a loop and pull directly through loops on hook.
Single Crochet (SC): Insert your hook, YO and pull up a loop, YO, pull through two loops on hook.
Pattern
Chain 12, leaving a long tail so you can use it to sew the sides together.
Row 1: Work a half double slip stitch into each bump starting in the third stitch from the hook. (Before you start, turn your chain over and you will see little bumps, it is much neater finish if you work your first row into these bumps.) Chain 2 and turn. (10 HDSS)
Rows 2 – 20: Work one half double slip stitch into the back loop of each stitch, chain 2 and turn.
Pull the loop loose and remove your hook, you’ll come back to it but it’s time to sew the sides together to make the wrist.
With your tapestry needle, thread the tail and sew the sides together. The best way I have found is to go under the two loops of the starting chain, and up through the back loop of the HDSS, then over and back up under the two loops of the next chain space. You are sewing the sides together and the yarn is worked in a spiral motion working up the side using each stitch. Don’t weave the tail in just yet, you’ll use it as a place marker. It will come in handy as you work each round!
You should have sewn from the bottom up to the loop. That’s how you’ll know you’ve worked 20 rows. The tail should be just by the loop.
Insert your hook back into the loop and work one row of all SC around the top of the band. You need 27 SC. You have 20 stitches, so make it work! Ha Ha. There is no good way to tell you how to do this except to say to space them as evenly as possible and get 27 of them in. Do NOT join when you get back to the first SC you made. (This is where that tail comes in handy as a stitch marker, it will tell you when you’ve completed a round.) We are going to simply just start working the next row.
Row 1 of the Sprig Stitch: In the first SC, *work 2 SC, CH 2, in the next SC, work 2 SC. skip over one SC.* Repeat * 8 times. (You should have 9 chain 2 spaces, or little peaks that you will work into for the next row.) Do NOT join. Skip over the remaining chain and the first 2 SC and work directly from here on out into the chain 2 space.
Rows 2 – 4: Work “2 SC, CH 2, 2 SC,” (Sprig Stitch) into each chain 2 space.
Row 5: Skip over the first 2 chain 2 spaces and work your sprig stitch into the next 7 chain 2 spaces.
Rows 6 – 13: (or 14 rows if you have bigger hands, try it on and see!) Work the sprig stitch into each chain 2 space. (There should be 7 chain 2 spaces.)
To close the top of the mitten, slip stitch into each chain 2 space bringing the top closed. Continue slip stitching a few more times after you have worked the chain 2 spaces until it’s tight. Cut off and weave in the ends pulling the top in as tight as you wish.
Thumb
Row 1: Pull up a loop in the next space after the second set of Sprigs. (the 2 you skipped over in row 5.) Work 2 SC and 2 chains, in the next space, work 2 SC. SKIP over one stitch and work 2 SC, CH 2, into the next. Then work 2 SC into the next space. (These stitches/spaces are hard to find, do your best, what you are doing is creating 2 more sprig stitches before you get back to the 2 that are already there.) Do not join.
Rows 2 – 3: (Or maybe 4? See what you need for your own hand measurement, keep trying it on.) Work the Sprig Stitch into each CH 2 space.
To close the top of the thumb, slip stitch into each Chain 2 space and pull it tighter. Keep working slip stitches until it’s pulled in. Cut off and weave in the ends pulling it as tight as you wish.
Weave in all other ends.
Now turn the mitten inside out. Ahh! There is the pretty sprig stitch side!
If you prefer to have a little video help, I’ve recorded 5 of the different steps to help you out.
Now go make one more! There is nothing different you need to do for right or left, they work on either hand.

Thanks for stopping by to see these crochet sprig stitch mittens! Come and find me on Instagram! Just click on the pretty pictures at the bottom of this page and it will take you straight to my account! Let’s be crochet friends!
xo,
Tiffany
Click here or on image below for printable pattern