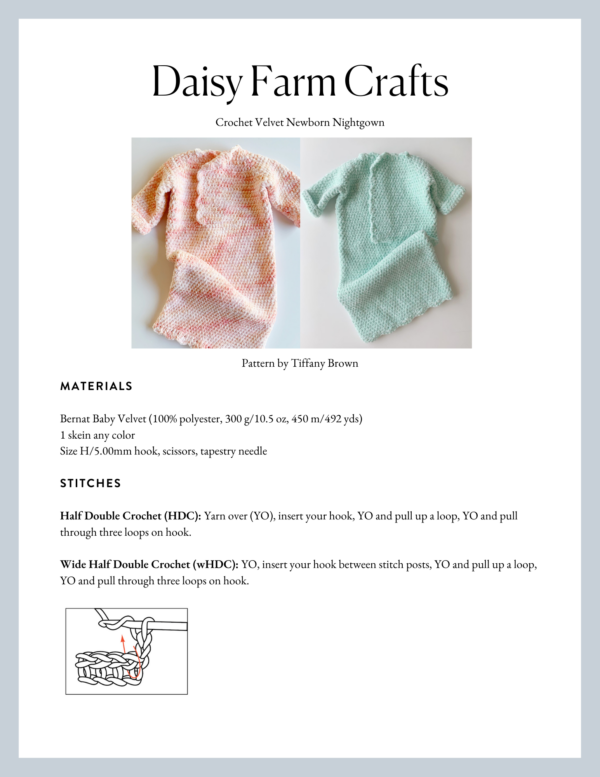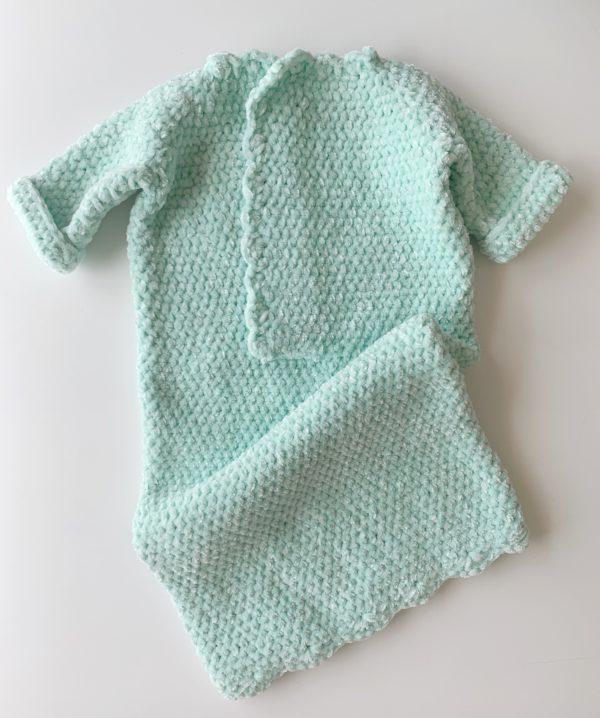
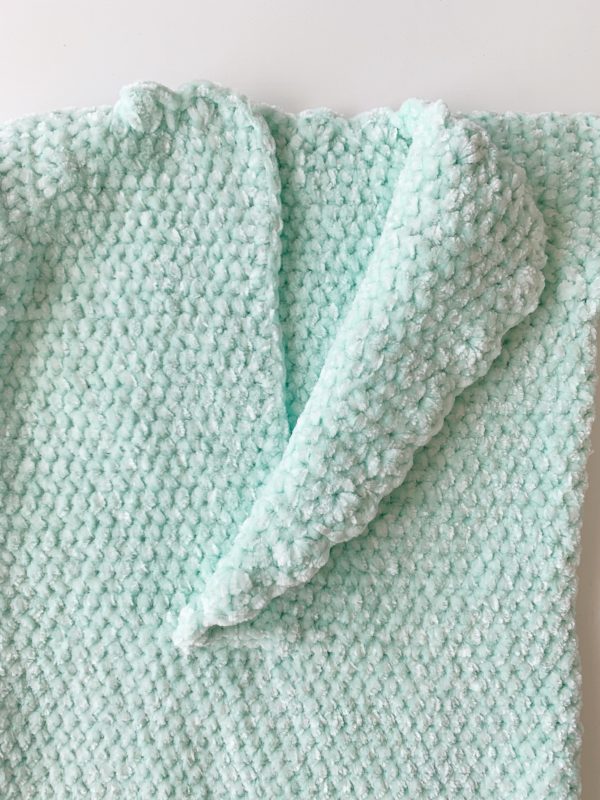
Oh isn’t this just so 1950’s vintage bathrobe? I so love and dream of holding a newborn snuggled up inside.
This idea started with some extra Bernat Baby Crushed Velvet I had on hand. And because velvet is so, so soft every time I made a blanket with it, I also wondered if I could made a sweater or cardigan.
But as I was making it, it kept growing and growing and I had the idea to turn it into a gown.
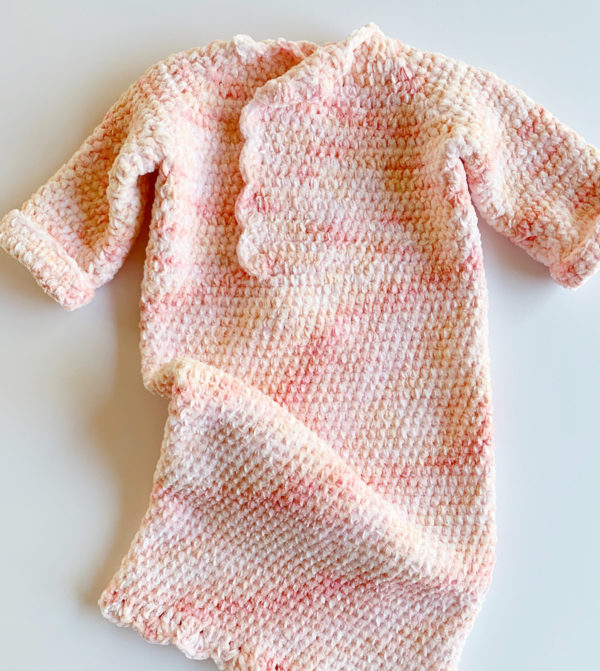
I made some adjustments to the size and to the length of the opening so the gown can be put on the baby by inserting its feet down through the neck and then place the arms into the armholes. The gown is too long to go over the baby’s head. But I’m leaving the gown long and open for diaper changes.
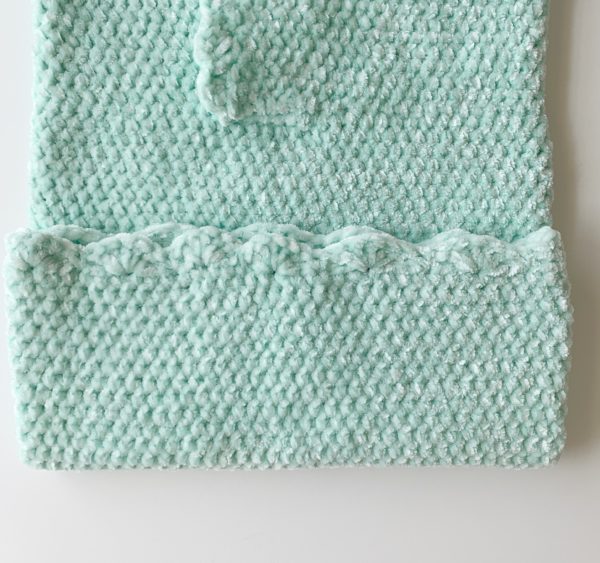
This is for a newborn to about a 12 pound baby. I made it from the neck down, joined the placket and then continued working in the round without any seams. Then added a shell border. You will see a bit of unevenness when you join the shell border, but it’s placed in the back of the gown to be less noticeable.
Materials
Bernat Baby Velvet (100% polyester, 300 g/10.5 oz, 450 m/492 yds)
1 skein any color
Size H/5.00mm hook, scissors, tapestry needle
Stitches
Half Double Crochet (HDC): Yarn over (YO), insert your hook, YO and pull up a loop, YO and pull through three loops on hook.
Wide Half Double Crochet (wHDC): YO, insert your hook between stitch posts, YO and pull up a loop, YO and pull through three loops on hook.
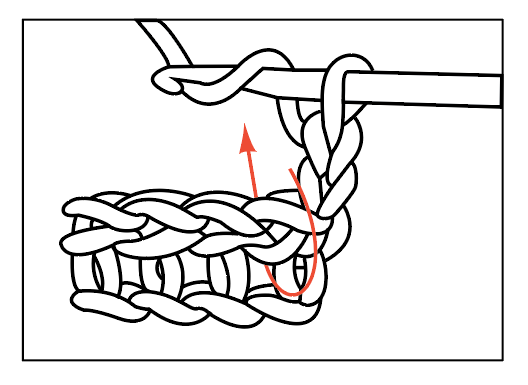
Single Crochet (SC): Insert your hook, YO and pull up a loop, YO and pull through two loops on hook.
Double Crochet (DC): YO, insert your hook, YO and pull up a loop, YO, pull through two loops, YO, pull through remaining two loops.
Pattern
Chain 38.
Row 1: Work 1 HDC in 3rd chain from hook. 1 HDC into the next chain. *Work 2 HDC in next chain, 1 HDC into each of the next 2 chains, repeat from * across the row. CH 2 and turn. (48 HDC’s made)
Row 2: Work 1 Wide HDC (wHDC) in each of the next 8 spaces. 3 wHDC in next space. 1 wHDC in each of the next 4 spaces. 3 wHDC in next space. 1 wHDC in each of the next 16 spaces. 3 wHDC in next space. 1 wHDC in each of the next 4 spaces. 3 wHDC in next space. 1 wHDC in each of the remaining 12 spaces. CH 2 and turn.
Tip: the last stitch of each round is worked in the space between the last post and the turning chain.
Row 3: *Work 1 wHDC in each space to the corner 3 HDC’s of the row below. Work 2 wHDC in between first and second post and work 2 wHDC in between second and third post. Repeat from * around. CH 2 and turn.
Tip: Mark the space in between the 2 sets of 2 HDC’s for ease of finding the space where you will be working 3 HDC’s in Row 4.
Row 4: *Work 1 wHDC in each space, (including in between the pair of HDC’s that are worked together) to the space in between the 2 sets of HDC’s of the row below. Work 3 wHDC in that space. Repeat from * around. CH 2 and turn.
Rows 5 through 9: Repeat rows 3 and 4.
Row 10: (Joining for the armholes) Work 1 wHDC in each space to the center space between the pairs of HDC. *Work 1 wHDC into the center space, CH 4, SKIP over all the stitches to the next center space, work 1 wHDC. Work wHDC across the back and to the next center space. Repeat from * and finish with wHDC to the end of the round. CH 2 and turn.
Row 11: Work 1 wHDC in each space across the row working 4 HDC around the chains that make the armhole. CH 2 and turn.
Row 12 until the measurement from the neck down reaches 8 inches: Lay the gown flat and position the longer flap over the shorter for 8 stitches. Work the first 8 wHDC of the round by working the hook through both sides of the gown joining the front together. Then continue wHDC around. Do not join.
Row 13 until the gown measures 20 inches: Work 1 wHDC in each space around the row. Do not join or turn. You will be working in the round.
Shell border on the bottom of the gown: estimate the center space in the back of the gown and work *5 DC, skip two spaces, work 1 SC, repeat from * around the bottom of gown, join with a slip stitch to the starting stitch of the round. (Do your best to estimate the placement of the last shell of the round, so if you need to just skip one space and end with a SC before the starting shell, it will look a little better.) Tie off and weave in the end.
Sleeves: Pull up a loop in the center space of the chain 4 that is the bottom of the armhole. Work 1 HDC in that space. wHDC in the next space. Work a wide HDC 3 together across the next 3 spaces (this will fill in the corner spaces). Work wHDC in each space around to the last space, work wHDC3tog across the last 3 spaces that make the corner, work final wHDC in space before starting st. Join with a slip stitch to starting ch space, CH 1 and turn.
Round 2 until sleeve measures 7.5 inches: Work wHDC in each space around, join with a slip stitch to starting ch space, CH 1 and turn.
Tip: count how many stitches around on round 2 and keep it the same amount each round. Also, keep it the same amount for the second sleeve. When joining the rounds, insert your hook underneath the turning chain, then CH 1 and turn.
Edging around the neck: Begin on the inside of the front placket. Pull up a loop and SC. SC in each space working toward the neck. Work 3 SC into the corner space. *Skip one space, work 3 DC into the next space. Skip one space, SC into the next space. Repeat from * around the neck and down the front of the gown. Join with a slip stitch at the bottom, tie off and weave in the end.
I don’t have a video for this quite yet, I still am waiting for nail salons to open back up and life return to be a little bit normal. I also would love for you to reach out and let me know of any typos or errors you might see. Also, I’d love to know if you make it and get to hold a brand new baby all cuddled up inside!
Come join our Daisy Farm Crafters Group on Facebook, or use the #daisyfarmcrafts on Instagram. We love to see your pictures!
xo, Tiffany
Click here or on image below for printable PDF