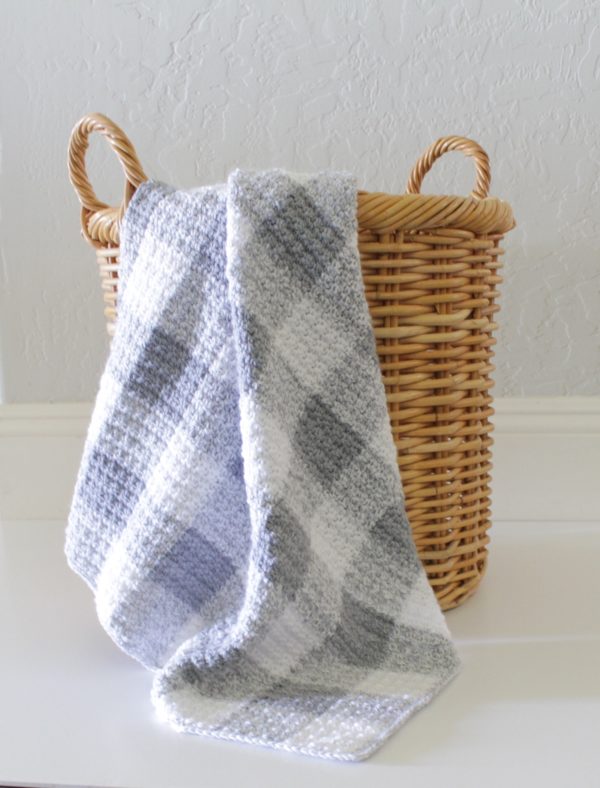
A crochet gray gingham blanket for the win! Out of all the gingham blankets I’ve made so far, this has to be my absolute favorite! Of course, I do say that about all of them! The first one I’ve made was in pink, then I made one in purple, and then one in black.
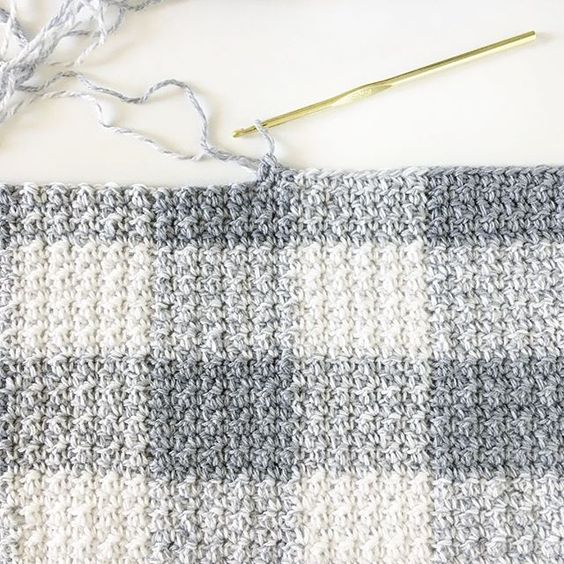
I’ve used a different stitch each time, to mix things up and keep experimenting with the technique. For this crochet gingham in gray blanket, I used the crumpled griddle stitch.

And, I’ve also changed up the yarn each time. For this blanket, I’ve used Paton’s Beehive Baby Sport that you can easily order from Yarnspirations.com. I highly recommend using it for this project. Not only will you get the grey gingham look, but the lightweight texture of the yarn turns out perfect for a baby. This is not a heavy blanket that would be a pain to carry around, this is a nice, soft, light weight blanket that blocked perfectly when I was finished. Plus, and let’s be real, none of my mistakes could be seen! (and I had several that I didn’t even see until a few rows later, and much too late to undo.)
And that is why I am loving this blanket!
Here are a few tips before you get started that will help you understand the pattern. Each block is 11 stitches wide, and 8 rows high. They are measuring roughly 2.5 inches square. But, please do a practice swatch and work with your own personal tension. Everyone crochets differently. The important thing is to make the blocks square.
This stitch pattern is essentially alternating SC and DC that are stacked on top of each other. So a SC stitch is always worked into the top of a SC, and the same for a DC always worked into the DC of the row below. Each row will begin and end with a SC. You will always chain one and turn.
You are crocheting OVER the yarn not in use. This works! It stays relatively hidden through your work, and the bits of color that do show through give the blanket more of the gingham feel. However, the yarn will twist naturally, so please untwist the skeins after each row. This will save you from a headache. Better yet, I’ve found I like keeping each color in a yarn bowl, and then untwisting is a piece of cake. At first, this was a pain, but then I realized I was happy to untwist the yarn and it was much faster than weaving in A LOT of ends if I were to change colors the traditional way.
The Baby Gray Marl color will be used in every row throughout the entire blanket. NEVER alternate the solid gray with the solid white.
Materials
Patons Beehive Baby Sport (70% acrylic, 30% nylon, 100 g/3.5 oz, 328 m/359 yds)
1 skein Angel White, 1 skein Baby Gray, 2 skeins Baby Gray Marl
Size H/5.00mm hook, tapestry needle, scissors
Size
Finished size 29 in x 29 in
Stitches
Single Crochet (SC): Insert your hook, yarn over (YO) and pull up a loop, YO, pull through two loops on hook.
Double Crochet (DC): YO, insert your hook, YO and pull up a loop, YO, pull through two loops, YO, pull through remaining two loops.
Pattern
Instructions
-Pull through with the new color on the last step of the stitch.
-Lay whichever color you aren’t using along the top of your work and crochet over it as you go.
-To avoid your yarn getting twisted as you carry it along your work, it helps to always keep one color to the front and one color to the back each time you switch colors.
Chain 122 (Pattern repeat is 11 + 1 if you’d like to make your own size) in Angel White.
Row 1: In the second chain from the hook, SC. In the next space, DC. Alternate SC and DC for the next 9 chains. Insert your hook into the 11th chain space, yarn over and pull up a loop but then stop, and change colors. Pull through and finish the SC with the baby grey marl. DC into the next stitch with the new color, and crochet OVER the Angel White. You are bringing it along with you. Underneath and through your work. You will be changing colors every 11 stitches.
If this is not making sense, please watch this video clip:
Row 2: Chain one and turn. You should have ended the row with a SC and with Angel White. Bring the Baby Gray Marl around the end of your work and continue crocheting over this strand. Work your first SC into the SC you just made of the row below. Then, work a DC into the next DC. Continue this alternating pattern and before you finish the 11th stitch, pull up the Baby Gray Marl to change colors. Now work the next 11 stitches with the new color, switching back to the Angel White in the 11th stitch. Finish to the end of the row, chain one and turn.
Rows 3 – 8: Continue switching colors every 11th stitch. Pull through the last stitch with the Baby Gray Marl chain one and turn.
Row 9: Cut off the white, leaving a long end to weave in later, about nine inches. Work your alternating SC and DC into the next 11 spaces. However, at the 11th stitch, pull through with Baby Gray. Now work the pattern across alternating Baby Gray Marl and Baby Gray. Continue for 8 rows.
Repeat this pattern for the rest of the blanket. Make it 11 blocks wide by 11 blocks high, or however you’d like to make it.
(In case you still are lost on how to start a gingham blanket, I have this video clip that might help. I talk in this one and even though it’s not for this specific blanket, it might answer a lot of questions you might have. The technique is the same, crocheting over a strand of yarn not in use, but the stitches are different. I also explain about color choices in case you were wanting to do something other than gray.)
You can also watch this video, which shows how you can keep your yarn from twisting when working the gingham:
For the border, first I wove in all the ends with the tapestry needle. Then, I simply inserted my hook in any stitch on the side of the blanket and worked a row of SC all the way around, working 3 SC into each corner. I joined at the end of the round, chained one and did one more round of SC into each SC, working 3 SC into each corner again. Then joined, cut the yarn and wove in the last end.
To get your blanket primo looking, lay it out on a beach towel, grab a spray bottle and gently wet the blanket and smooth it out and shape it into a square with your fingers. I had one corner that kept curling on me and I sprayed that with a bit more water, pressed with the towel, and it flattened right out. Then, let it dry.
If you have any questions about this gingham crochet blanket, please see my Crochet Gingham Blanket Frequently Asked Questions post. And when you finish your project, please share and tag me on Instagram or Facebook! I’d love to see!
Tiffany
Click here or on image below for printable pattern
![]()
